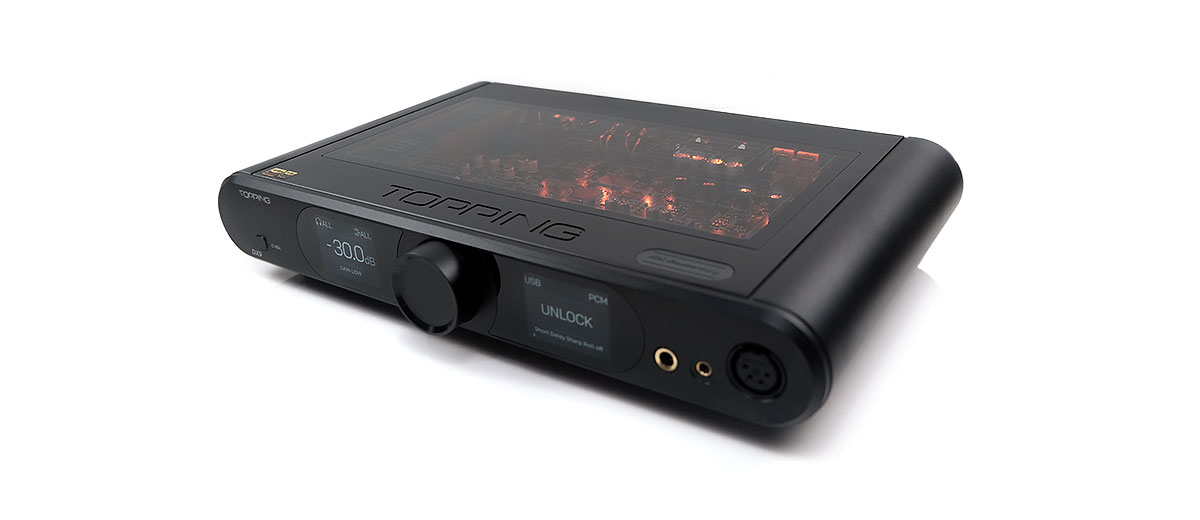
Today, Marcus reviews the $1299 Topping DX9, which is a limited edition integrated desktop AK4499EQ DAC and 10W-capable headphone amplifier with pre-amp support.
Disclaimer: This sample unit was sent to me in exchange for my honest opinion. Headfonics is an independent website with no affiliate links or status. We thank the team at Topping for supporting us.
Click here to read more about Topping products we have previously reviewed on Headfonics.
Note that this article follows our current scoring guidelines which you can read in more detail here.
The last Topping desktop unit I reviewed was the D90 DAC in 2020 with more current units such as the D90 Sabre III and the L70 since reviewed by the rest of the team.
This was one of Topping’s last AK4499EQ chipset DACs before the AKM fire changed the marketplace forcing many companies to turn to alternatives such as ESS and R-2R for their DAC implementations.
Ironically, the new Topping DX9 sitting on my desktop for the last few months uses the same AK4499EQ albeit in a 15th anniversary limited run. At $1299 it’s also positioned as their flagship though for how long depends on how many are made.
The DX9 also taps into the company’s DX7 integration roots so this is not just a DAC but also a balanced preamp, a powerful headphone amplifier, and a BT receiver.
In a snapshot, I can tell you the DX9 is a versatile and attractively designed unit. It offers a clean, resolving, and neutral sound signature that will drive just about any headphones in the market today including being sensitive enough for IEM users.
To find out how I came to that conclusion and how the DX9 fares against the competition you can read my full review below in more detail.
Features
The DX9 is a beast with tons of features but also one to two omissions I wish were on the list.
Its primary purpose is to serve as the nerve center for decoding and amplification for headphone and power amp users. It can do this as a traditional wired device via USB, I²S, AES, SPDIF, or as a wireless receiver via a QCC5125-equipped BT5.1 module.
Its 4-channel AK4499EQ DAC chipset is independently powered from the amplifier and can natively decode up to DSD512, PCM 32BIT/768kHz.
Via SPDIF (optical and coaxial) decoding is the maximum carrier rate of 24BIT/192kHz. If you switch to its BT receiving module the DX9 will offer up to LDAC including aptX Adaptive.
The DX9 can operate as a balanced or singled-ended amplifier for headphones with fixed line-out and variable pre-amp options for those who wish to use it in their hi-fi system.
It uses a 6-channel discrete-engineered NFCA amplification design which is Topping’s in-house developed topology. The choice of 6 modules means SE and balanced output (2 and 4 channels) operate independently further reducing noise.
Its headphone output rating is competitive with up to 10W on a 16Ω load down to 7W @32Ω and a healthy 950mW @300Ω load. The DX9 should have no issues driving demanding headphones. Output impedance is also IEM-friendly at <0.1Ω for all PO.
Its fixed line out is a standard 2.1Vrms SE and 4.2Vrms balanced with the pre output delivering a lot more at roughly 16.5Vrms via its XLR balanced outputs using high gain.
The omissions? Sadly, there is no analog line-in to pair the amplifier with 3rd party DACs, the DX9 is a closed-system unit in that regard. Also, there is no streaming capability via WiFi or LAN, features some of its direct competitors offer.
Design
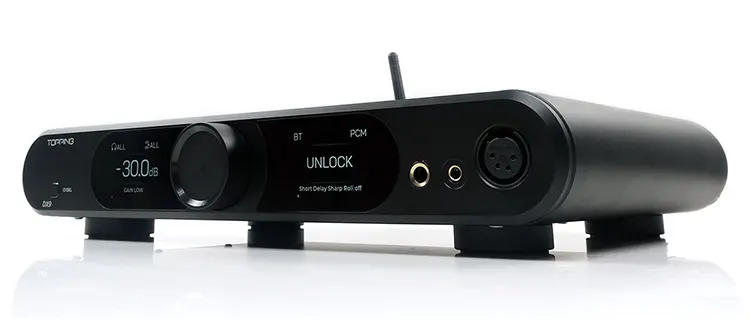
The DX9 design language is consistent with their previous integrated units such as the DX5 with a rounded chassis, clean chamfered lines, and slim-line form factor.
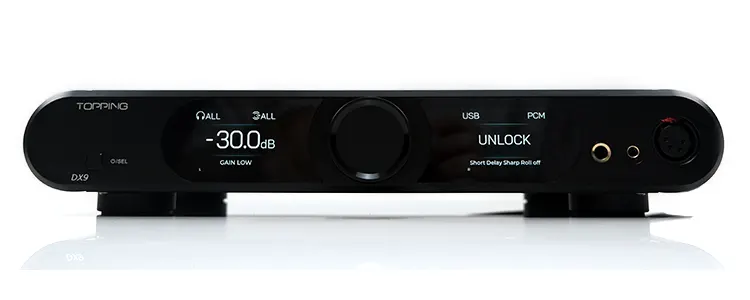
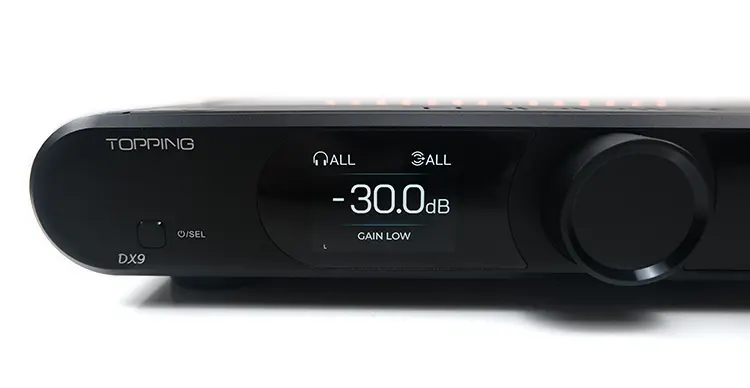
It’s a wide but shallow set of dimensions at 43cm x 22.5cm x 6cm dominated by 2 large front panel LCD screens making the DX9 ideal for racking shelves with restrictive height and depth.
With a net weight of 2.75kg, the DX9 is not too heavy. Four sturdy pillars underneath also offer excellent stability and grip on smoother surfaces.
The aesthetical highlight, if you could call it that, is the softly illuminated warm glow of a glass panel on top. One that allows you to see almost all of the internal components of the DX9.
It’s a common trade show approach when showcasing new gear and a finish that I find attractive to the eye. Yes, it has been done before by RME with their ADI-2 Pro Anniversary Edition a few years back but it should not take away from how beautiful the unit looks in low light with its turned on.
If you are not a fan of the ‘glow’ the DX9 does have a menu option to progressively lower the illumination to your preferred level or keep it in a self-adjusting auto-mode.
The glass illumination is further enhanced with the option to display dual VU meters in that same warm amber light on both LCD screens. The net result can be a veritable light show from the DX9 if you are not careful.
Two small observations regarding heating and fingerprints. First, because of the variation in build materials, I found the glass top panel to run hotter than the aluminum chassis during use. Second, the panel is a bit of a fingerprint magnet and requires cleaning regularly.
I/O
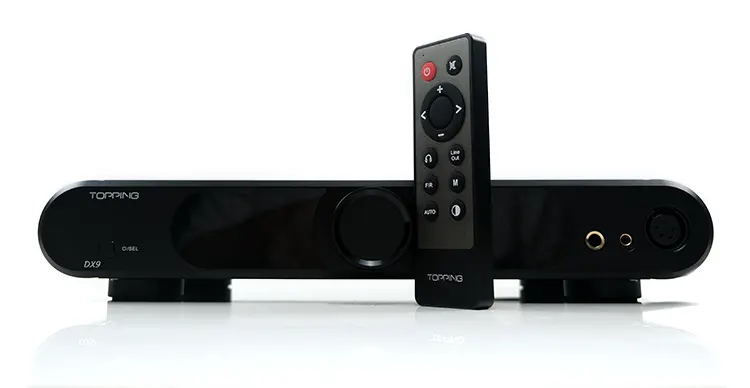
The DX9 has a wide range of inputs and outputs. On the front panel, you have both SE and balanced 6.35mm and 4.4mm/4-pin XLR outputs for headphone and IEM connectivity.
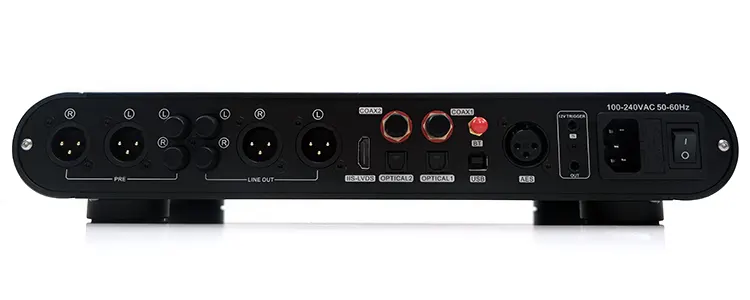
On the rear panel, there is a provision for single-ended dual RCA and balanced 3-pin XLR pre and line-out analog output connections to connect to power amps or alternative headphone amplifiers.
You also get I2S, dual optical and coaxial connections, a single set of USB-B and AES sockets, and the BT antennae threaded socket just above to handle incoming digital signals from PC/MAC or sources/transports with equivalent digital outputs.
The final IO to the far right is a 12V Trigger IN/OUT 3.5mm AUX cable system to allow compatible devices to either control the DX9 power on the upstream or the DX9 to control the other device on the downstream.
Controls
The DX9 has three distinct control methods to access its features; a small power on/select button to the far left, a multifunctional rotary dial in the middle, and a dedicated remote control beautifully machined from CNC-Aluminum.
The small button to the far left will allow you to deep dive into the full menu suite with a very comprehensive set of options at your fingertips.
Volume Dial
A multifunctional middle dial primarily operates the resistor-based relay attenuator for volume control but a single press will allow you to round-robin through the input modes.
The DX9 volume control is technically a hybrid digital and stepped analog solution meaning you will hear a mechanical clicking sound with a set of dB volume movements, up or down.
The analog steps operate in 6 dB intervals and it is these steps that cause the mechanical click. The digital volume control operates at a granular level between those analog steps without activating the clicking.
There are 99 dB of total volume range in incremental steps of 0.5 dB. The precise sequence is 10 dB from -99 dB to -89 dB to activate the first relay click and beyond the analog relay click is every 6 dB, for example, -12 dB or -6 dB.
Main Menu
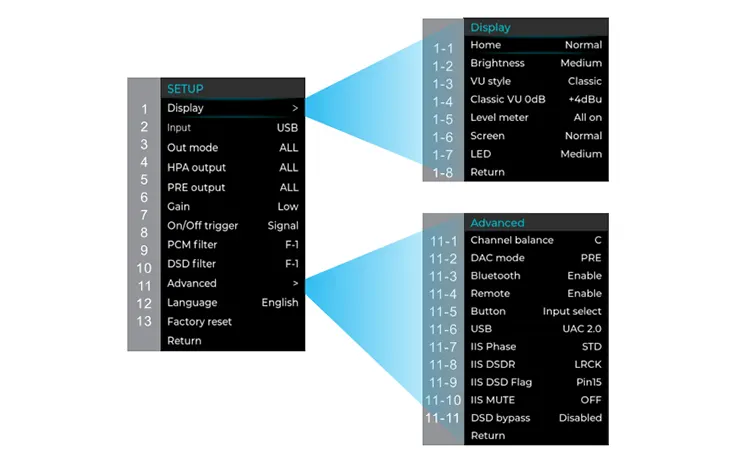
The main menu has 3 workflows with the main menu on one screen flow and then two sub-menu systems for digital controls and display configurations.
You can navigate through them either manually via the rotary dial or using the arrow keys on the remote control.
Just about everything is covered in this menu system with gain, filter choices, and a fine level of individual output configuration which I have not seen before on integrated DAC/Amps at this price point.
Sure, you get the ability to switch from pre to line on most systems but I have never seen the ability to turn each output on and off individually including the PO for headphones, remote control options, and BT. Impressive stuff!
Probably the most significant set of controls for me was the ‘ALL’ value for the out mode option which defaults to the DX9 to pre-out with variable volume control.
If you want to use the full Vrms fixed line-out instead you will need to select the DAC mode in the advance menu and round robin to line-out in the setup menu.
I²S users will be pleased to see you have a degree of control over the precise pin configuration for your connecting lead and source compatibility. Not all I²S DACs offer this type of control, and not all sources and cables have I²S configured the same way so it can get messy if there is an issue.
Thankfully, using the Cayin N8ii, N7, and the Mini-CD MK2 I²S outputs (regular and mini) there were no compatibility issues meaning I didn’t have to dive into these options and customize them.
Remote Control
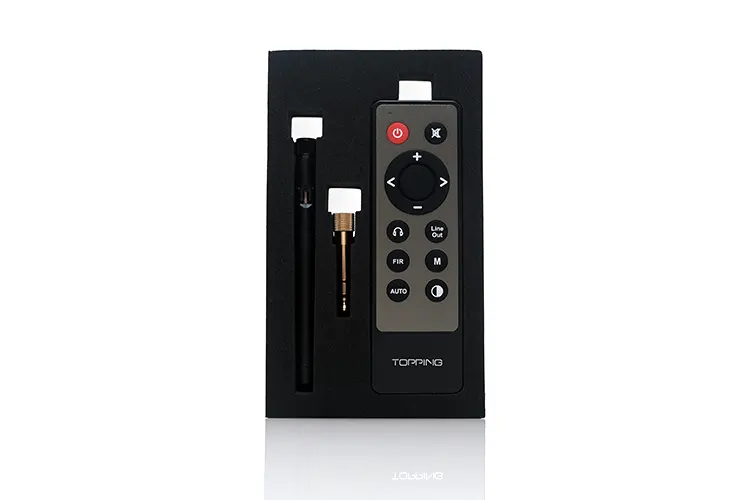
This is a beautifully designed remote control, almost old-school in its build quality with a solid CNC-machined and sandblasted aluminum chassis and a well-spaced-out button configuration. I have a set of Cayin and Shanling plastics remotes here and the difference in quality is night and day.
The only physical features I wish it had were a few soft rubber cushions on its base so I could place it on top of the DX9 without fear of scratching either unit.
This remote control does not come with a battery. Chinese export regulations for air cargo are very strict for batteries.
Luckily, it is just 1 pill-type CR2032 battery required which you can get in any hardware store for a few cents. Simply unscrew the back panel, slot it in, screw it back up and you are good to go.
Packaging & Accessories
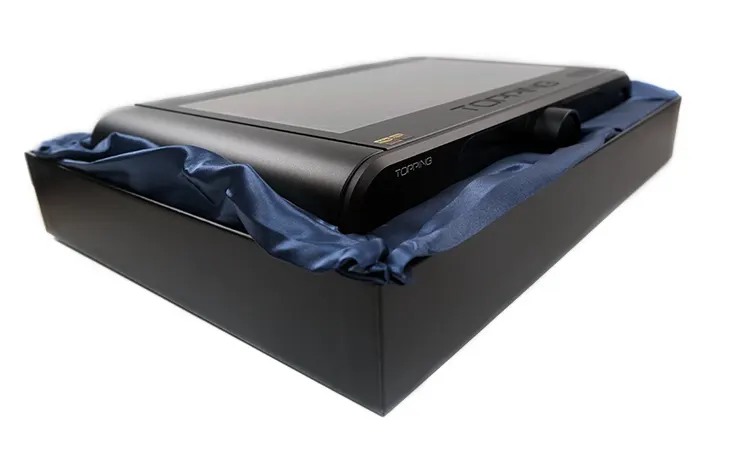
The DX9 comes in a very classy packing ensemble. You get a stealthy black outer retail box with a simple, elegant picture of the unit’s top panel Topping branding on display.
The power cable options are housed in a separate plain box beside the main retail box with both boxes neatly arranged inside a larger but more generic brown box for courier purposes.
Inside the main box, the unit is housed in a soft silk bed reminiscent of HIFIMAN headphones lining, however, this is the first time I have seen an amplifier in a similar setup.
Underneath the unit are all the accessories neatly arranged in a small foam tray including a USB-B to USB-A cable, the remote control, an additional 6.35mm to 3.5mm convertor, and the screw-on Bluetooth antenna.
Click on page 2 below for my sound impressions and recommended pairings.

