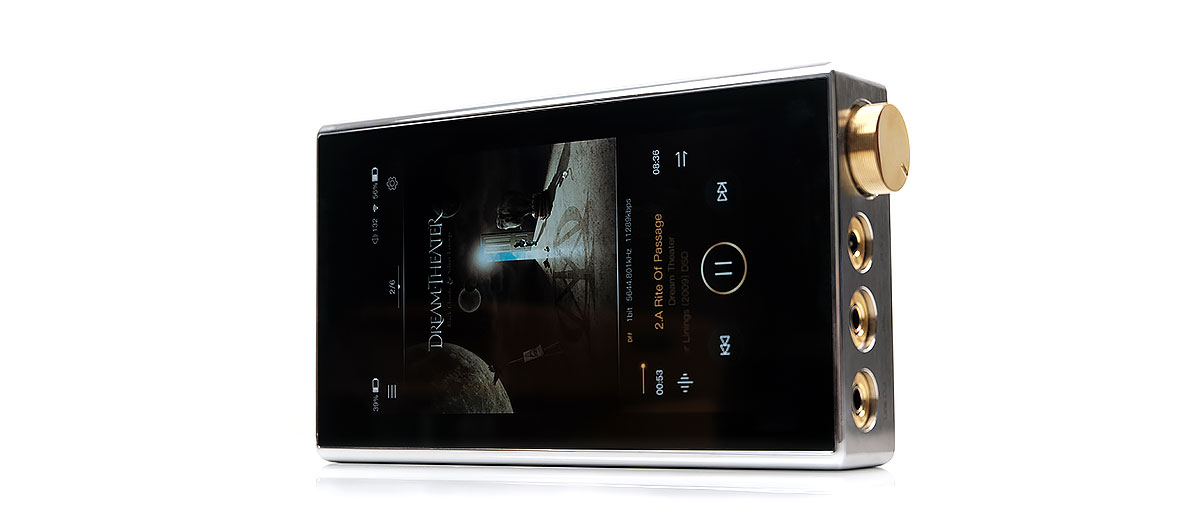
The iBasso DX220 MAX is a unique transportable media player based on the DX220 ES9028PRO chipset but with a separate analog-controlled amplification design. It is priced at $1888.
Disclaimer: This is a sample sent in exchange for our honest opinion. Headfonics is an independent website with no affiliate links or status We thank iBasso for this opportunity.
To learn more about the iBasso products reviewed on Headfonics you can click here.
Note, that this article follows our current scoring guidelines which you can read up on here.
Back in August 2018, I was invited by Sony to the unveiling of their latest audiophile lineup in Hong Kong. This was an event where the incredibly esoteric DMP-Z1 took center stage and was priced at an eye-watering $8000.
The DMP-Z1 was a battery-powered, loosely transportable desktop amplifier integrated with their proprietary DAP technology into one very large media player.
Everyone “oohed and aahed” and to be honest so did I. This was unusual, unclassifiable in part but ultimately a head-scratcher. Who would want this? The coffee table audiophile? The rich playboy perhaps? It was a wonderful technological feat but one that remains ridiculously niche.
Why start with Sony? Because in a manner of speaking, the new iBasso DX220 MAX stalks that same niche. Only, it is cheaper, much cheaper, and thus more obtainable to a wider audience.
It is also smaller and much more transportable with an expansive and well-known OS. The DX220 MAX also builds on some legacy technology, most notably the DX220 DAP so it is not without a baseline of existing know-how.
However, is it a DAP as we traditionally define one? I am not so sure. As a modern transportable media player, it most certainly has enough features to warrant a classification all in its own right. Can you use it as a DAP? Absolutely, but then audiophiles are a game lot.
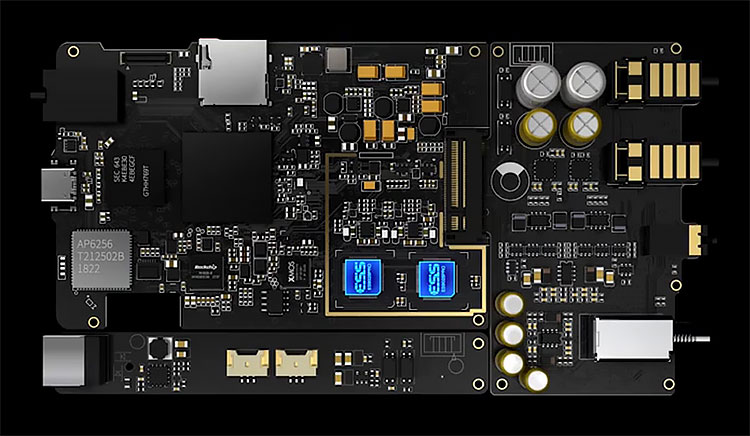
Tech Inside
The DX220 Max is aptly named. It draws a lot of technology from the existing DX220 platform, but at the same time the internal topology, particularly the amplification stage, has been completely redesigned.
Legacy DAC
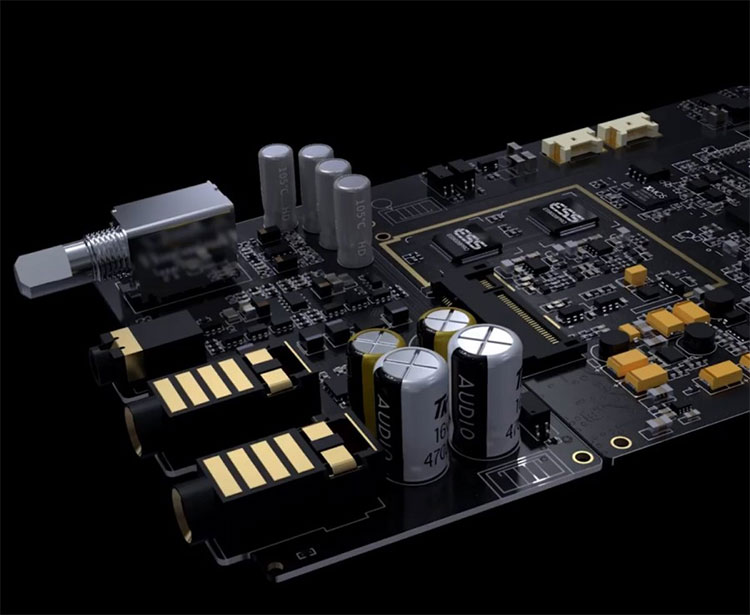
The main legacy component from the original DX220 is the delta-sigma DAC chipset, a dual Sabre ES9028PRO configuration. Decoding is a healthy PCM 32BIT/384kHz and native DSD decoding up to DSD512 similar to how the DX220 performed.
It also means the DX220 MAX supports MQA in X4 mode as well as hardware support for streaming MQA via the TIDAL up to 72kHz. iBasso has retained Bitperfect playback in the DX220 MAX OS architecture so there is no gimping from Android for digital audio quality output.
Legacy CPU
The DX220 MAX still uses the same 8-core 64BIT ARMv8 processor for the CPU as the DX220 with 4GB which, until the launch of the new HiBy R8, is still one of the highest RAM configurations in the portable media player marketplace.
This Rockchip processor was the subject of much discussion previously due to the clock rate implementation and balancing the speed of the CPU with battery consumption. At times iBasso has dropped it to enhance the battery performance and then enhanced it again due to speed issues. It is a decent performer but not as fast as FiiO’s Samsung’s Exynos 7270 CPU.
On the DX220 MAX, the setting is at a healthy 216mHz to 1.01GHz, (same as the most recent firmware for the DX220). Combined with the original 4GB RAM installation the DX220 MAX OS and multi-tasking features should be equally as stable as the current DX220 firmware.
New Power supply
It is all about the topology this time around with a completely redesigned fixed amplifier stage and two battery power supplies that are separate from each other, one for digital and one for analog.
The DX220 MAX has a total of 5 individual li-poly batteries, 1 (3.8V 4400mAh) for the DAC and the CPU, and 4 (4 x 900mAh 8.4V) for the amplification circuit in the form of a high voltage battery pack. There is no shared battery such as you would find on their regular DX series DAPs.
The implementation of the power supply into two separate and distinct configurations with no overlap is designed to clamp down on noise filtering through the signal path from the USB port into the DAC and beyond into the amplification stage.
This isolation is achieved through the use of optocouplers and I2C isolators to completely isolate the digital to analog sections from any interference.
This is also where portable becomes transportable for the DX220 MAX because the size of that 4 battery pack does require a DC-in charging port for the amp stage though the DAC stage is USB-powered as per normal DAP designs.
Upgraded Components
The implementation of this new topology has also got some pretty serious upgrades in terms of capacitors and resistors as well as a superb new entirely analog potentiometer.
This includes Toshin UTSJ aluminum electrolytic capacitors and Kemet polymer tantalum capacitors being implemented to name but a few. All well-known high-end audiophile-grade components.
The analog potentiometer is a custom 4-wiper potentiometer that has less than +/-2dB channel tolerance. Most normal analog potentiometers are 3 terminal-based with a single wiper. Volume on the amplifier is in the analog domain but you do have access to the digital volume of the DAC which can, therefore, act as a quasi-preamp before using the analog main control.
Design
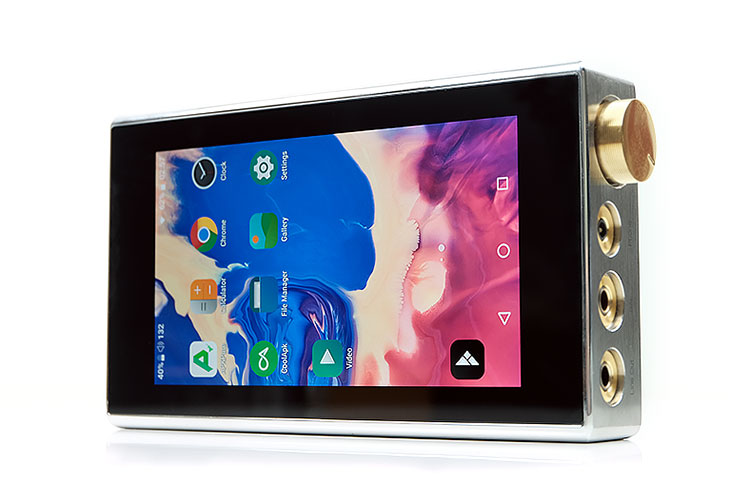
The DX220 MAX is a stunning-looking media player but it is also a huge device. Weighing in at approximately 700g and with dimensions of 145mm x 86mm x 27mm it is 100% not pocketable and if you must classify it as a DAP it is the biggest DAP ever made outside of the Sony DMP-Z1.
Whilst you can certainly bring it around with you and not require a power supply unless charging the design is built to rest snugly on your desktop rather than in your hand. You will need both hands to operate the DX220 MAX.
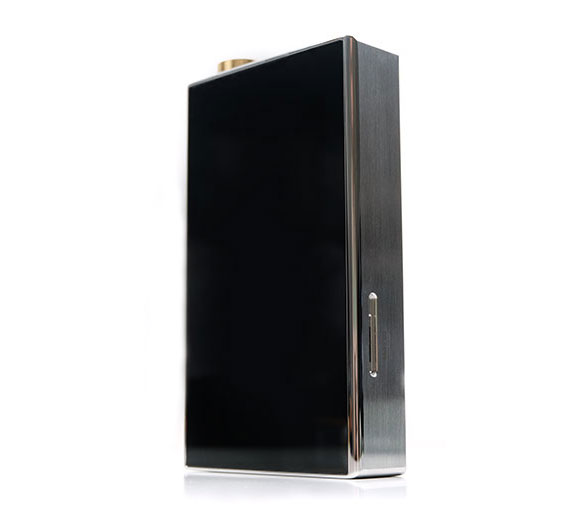
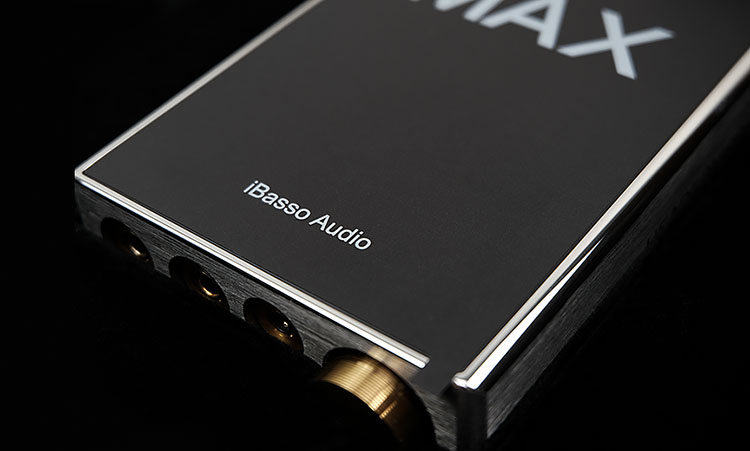
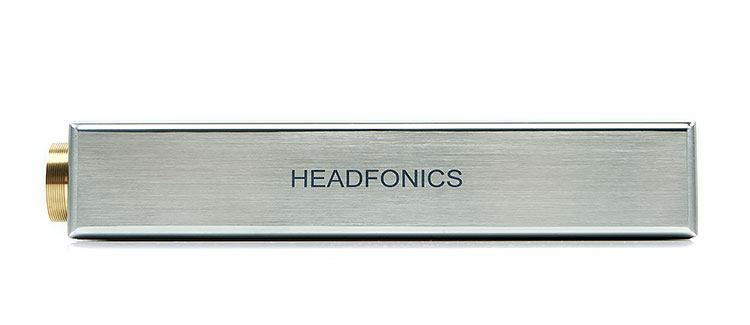
Do not let the dimensions distract you from the quality of the materials iBasso has thrown into the D220 MAX design. The form factor is a classic but smoothly cornered ‘brick’ but the finishing is top-notch with the use of CNC stainless steel body and an ‘aged’ finish for the main housing as well as a branded black tempered glass rear panel.
Both the analog potentiometer and sockets to the rear and front are all 24k gold-plated and do create some nice visual focus points that complement rather than create a garish contrast.
Screen
The 5″ IPS 1080p screen is the same excellent 455ppi 1080p multi-touch capable panel used on the DX220 but this time it is not borderless.
The bezel is fairly thick this time around which does detract a little from that ‘wow factor’ when I first saw it on the DX220. The flipside is the easier swiping given the lip of the included case is a few mm further back compared to the DX220.
What is interesting is that though iBasso has retained the protective Cornering Gorilla glass outer layer, the actual housing envelops that tricky curve much better than the DX220. That should mean screen protectors will not present as many niggles during application. It also seems to have a slightly better level of protection on the sides of the DX220 MAX.
The viewing angle of the DX220 MAX IPS panel is superb, I can almost read it flat at eye level. The color depth and saturation just fly off the screen, especially if you dial up the brightness to 100%.
However, for those looking to extract a bit more battery life out of the DX220 MAX, you cannot adjust the resolution like you can on the DX220. There is no 1080p/720p option in the Display menu options. Given the improved power management of the DX220 MAX, this may not be such an issue as it was before.
I/O
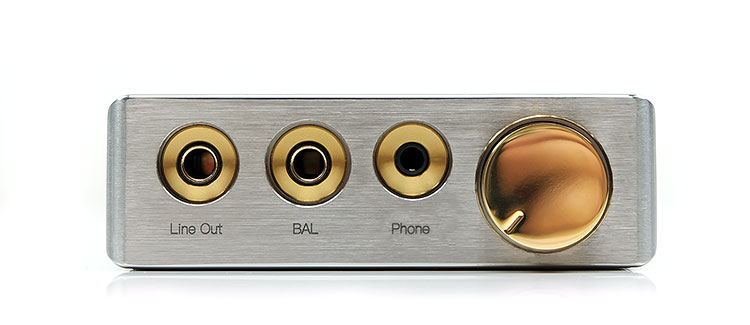
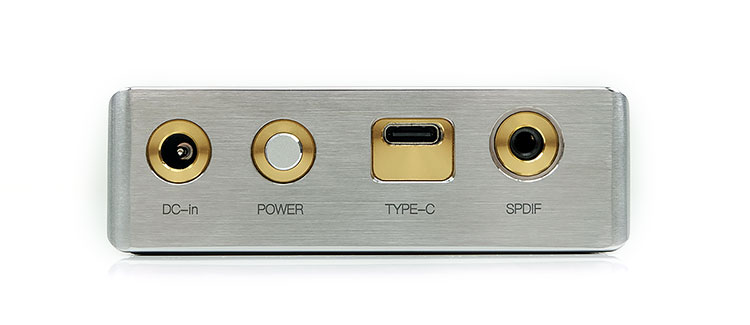
Analog outs are to the front and digital inputs to the rear. The only exception is the SPDIF output which is also to the rear.
The finishing on the ports are again gold-plated and with all that large real estate it is no surprise that the labeling and spacing between them are excellent. You should be able to fit some fat barrels with ease on these ports both rear and front as well as properly read what each one does without reverting to an icon-based menu in the manual.
Front Panel
The front panel covers the dedicated 4.4mm line-out as well as the DX220 MAX’s balanced and unbalanced PO which are 4.4mm and 3.5mm respectively. There is no room for a 2.5mm TRRS output this time. It seems only FiiO is going to give us the complete lineup of PO connections for media players this time around on the M15.
Rear Panel
The rear panel offers both charging mediums. The digital battery side of the DX220 MAX is managed by the type-C USB port and the analog battery pack is managed by the DC-in to the far left. In between, you have a huge power button that you simply cannot miss.
The power button might be too easy to use with little or no resistance. I tend to find that I accidentally turn on the DX220 MAX or turn off the screen when lifting it from the top and I might have preferred more resistance or a longer delay mechanism. Otherwise, it is beautifully built and smooth as butter to operate.
To the far right is the SPDIF output which is a legacy feature of almost all iBasso digital conversion toys going back to their portable Amp/DACs from over a decade ago. The SPDIF output can dual as a mini optical as well as coaxial output.
Controls
Like most modern media players, the DX220 MAX controls have a hybrid of controls, but apart from the analog potentiometer, it is missing traditional physical controls such as playback buttons.
The only physical control button is the rear panel power button which duals to turn the IPS panel on and off. The rest is done entirely through the touch panel options as well as some wireless options.
Touch
The Touchscreen will do everything you need the DX220 MAX to do outside of initiating analog volume control, power on/off, and LCD on/off. Unlike the HiBy R6 or Cayin N5ii/N8, you cannot use the screen to increase or decrease volume control.
The analog rotary dial will initiate and control only the amplifier volume. To set the DAC volume you need to navigate into the main OS Audio settings.
I would treat this as a pre-amp setting and leave it fairly high at around 130 in its 150-step volume range to allow for more control on the analog side. You can track the volume setting for the DAC on the front OS drop-down bar which has an individual volume display. There is no display for the analog output level.
Aside from that, you do have capacitive multi-gesture support including pinch and zoom, and various apps access to enhance keyboard support such as SwiftKey which I much prefer to the stock version.
Wireless
This is where it gets more diverse in terms of control capability and that is down to the DX220 MAX’s BT5.0 capability combined with its Android OS app scalability.
On the pure BT side if you want basic playback control then grab something like the FiiO RM1 for $20 which will replace the missing playback physical buttons quite well. You can also download the HiBY app and HiByLink to the DX220 MAX for individual track control with their server/client protocols.
As with previous Android DAP implementations, the DX220 MAX will operate as both a transmitter and a receiver using Bluetooth 5.0 as well as offering DLNA control features via WiFi though this will largely depend on the apps you are using.
It will also act as a Roon Remote via WiFi so long as you have TIDAL up and running on both the DX220 MAX and your Roon Core on your PC connected to TIDAL same time.
By switching on the ‘Bluetooth DAC+AMP Mode’ in the Bluetooth menu, you can stream audio from a smartphone to the DX220 MAX using any music app. That also includes streaming apps such as TIDAL which sounded superb on the DX220 MAX via a smartphone BT connection.
Because BT5.0 allows Bi-Directional support you can also flip the audio experience and stream your audio from the DX220 MAX to a receiver of choice such as your smartphone or another DAP source since it is backward compatible with BT4.2. I had no issues streaming from the DX220 MAX to the Lotoo PAW Gold Touch, for example.
Battery Life
The battery life of the DX220 MAX is split into 2 different parts, analog and digital, and completely separate from each other. You will quickly find out that you do have to keep an eye on both as they drain at different rates meaning at some point one will run out and usually not at the same time.
The analog stage uses 4 x 900mAh 8.4V li-poly batteries to form a single high voltage pack rated at 3600mAh and the single 3.8V 4400mAh is used for the digital side. You can continue to use the digital side when the analog runs out though you will not be able to use the PO since there will be no amplified signal.
Despite its analog design, the OS can tap into the status and you do get a battery icon on the top-right drop-down bar that drips down by a very useful percentage. You get a similar separate percentage-based battery icon on the left for the digital side.
Combined the DX220 MAX delivers a healthy 14-hour life cycle which, given the size and output ratings is very competitive. You will experience a drop in that when you start going heavy on the WiFi and Bluetooth as these tests are normally 50% volume with the screen off on lossy files.
Separate Cycles
The one interesting thing you will not find in the manual is the individual drawn-down rates of the analog and digital batteries. Each has its own lifecycle in terms of hours and they are impressive. The 14-hour spec from the manual applies more to the digital side of the DX220.
The analog side can last a bit longer at 15-16 hours. Of course, these will vary according to the load requirements, the current demand on the analog side as well as file resolution, CPU and RAM load, or WiFi/BT on the digital side.
Charging
Both sections have different charging times with the digital battery requiring 2.5 hours and the analog side needing 2 hours total charge time from 0-100%. The DX220 MAX does have quick charging capability with support for PD2.0, QC3.0, MTK PE + quick charging protocols for the digital side. I believe it is about 1.5 hours for around 70%.
Storage
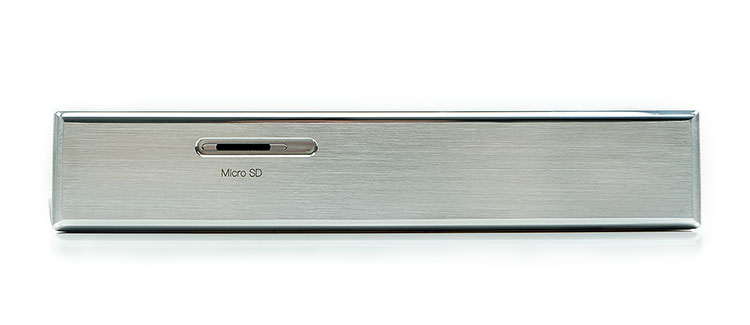
The DX220 MAX still uses a single open microSD slot, the same as the DX220. However, the onboard memory has been jacked up from 64Gb to a healthy 128GB which, given the price of the unit, is where I would expect it to be.
The DX220 MAX will support SDXC and SDHC cards. The official rating of how much memory the slot can handle could push beyond 512GB right up to the new 1TB cards and beyond. This is not a hard ceiling in terms of memory capacity.
I cannot test that, I tend to keep 64GB size cards only. I tend to find the lifespan of micro SD cards to vary and 64Gb is a more acceptable loss than 500GB if they decide to die.
OTG Expansion
The DX220 MAX is setup for OTG so flash drives and externally powered drives should be seen upon connection. Testing a SanDisk USB-C flash drive the DX220 MAX picked it up immediately.
I was able to drill down into it via the file manager and the Mango OS internal storage explorer as well as access it on apps such as Hifi Cast to initiate local rendering (playback).
One note of caution, I found that having the drive inserted and rebooting into Mango OS resulted in not being able to access any files even though it recognized there was a drive inserted in the directory list. You have to insert the drive after booting into Mango to access all the files on your flash drive.
The other point issue I had with OTG music tracks that persist from the DX220 firmware is the level of integration with the main media library.
Neither Mango OS nor the Mango app can scan the flash drive for tracks and integrate them into the media library. Whereas the likes of HiBy’s app can do that on the DX220 MAX.
Packaging & Accessories
The DX220 MAX black retail box is relatively large and that is no surprise given the girth of the actual unit. The packaging is more conventional than the DX220 slider box design but then again I think it would be a risk to have the DX220 MAX 700g body glued vertically to the side of a piece of cardboard.
The package is a hinged lid box that opens with the DX220 MAX nestled on display at the top of a dual-layer of velvet-wrapped foam inserts. On the second layer below you get your accessories and charger.
The unit itself has a protective black sticker on the front and a pre-applied screen protector on the rear. There is no screen protector applied to the front but you can find two tempered glass protectors in a black envelope along with a warranty card underneath.
I suspect iBasso would rather give you the choice given the previous issues with the original tempered glass of the DX220 dulling the sensitivity of the IPS panel.
Accessories
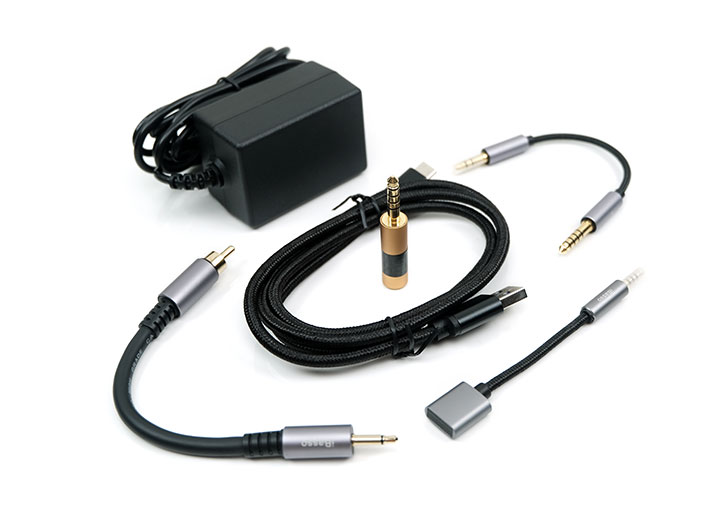
You get a good lineup of accessories for the DX220 MAX. Aside from the 18V AC charger you also receive the following:
- 2 x Screen protective films
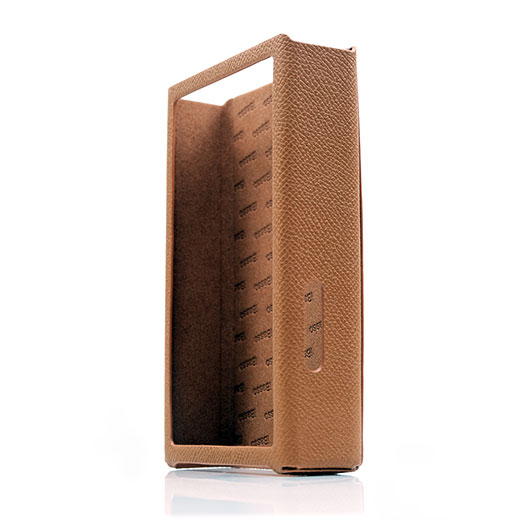
- 1 x Leather case
- 1 x USB Type-C Charging/Data Cable
- 1 x 4.4mm balanced to 3.5mm single-ended cable
- 1x 2.5mm balanced to 4.4mm balanced adapter (CA02)
- 1 x Coaxial (SPDIF) Cable
- 1 x Burn-In Cable
- 1 x User Manual
- 1 x Warranty Card
The brown leather case this time is excellent. I had some fiddly issues with the original DX220 leather case being cut too close to the rotary dial on the right side.
There is some rigidity to the new design also so it is not too soft and does not require too much tugging and pulling to stretch over the entire player. This time everything is very neat and tidy and it fits perfectly.
I am glad they also included their CA02 2.5mm to 4.4mm adaptor. I have had this for a while and tend to use it quite a lot. Since the DX220 MAX does not use a 2.5mm TRRS out it will come in handy for those with 2.5mm TRRS cable terminations.
Ibasso has also included their balanced burn-in cable though you will have to use the converter for the 4.4mm socket as the jack on the cable is 3.5mm TRRS. Also, they have included a balanced 4.4mm to 3.5mm short IC. This allows you to output a LO from the balanced 4.4mm output but it has direction so you cannot use it via the 3.5mm to a 4.4mm input.
Click On Page 2 below for Hardware & Software Impressions

