This review covers the new iBasso AMP12 balanced circuit amp card for their DX300 DAP with a maximum output of 8.3Vrms. It is priced at $229.
Disclaimer: The iBasso AMP12 was sent to us as a sample in exchange for our honest opinion. We thank iBasso for this opportunity.
To learn more about iBasso products featured on Headfonics you can click here.
Note, this 2-page article follows our latest scoring guidelines which you can read up on here.
The iBasso DX300 launched earlier this year scored really well with us with its big upgrades in software, internal hardware, and delivering a really nice analog presentation.
At the same time, however, iBasso took the opportunity to freshen up the amp card ecosystem from the original DX2XX series with the first being the DX300 stock card, called AMP11.
Now, since then AMP11+ came out which was an iterative update on the original and something we passed on in lieu of this, their first really distinctively new card, the AMP12. Priced at $229 it is a considerable investment but given the caliber of the DX2XX cards over the last few years, they do go down very well among iBasso DAP users.
For those that are not aware of what an amp card is well, it’s basically a swappable amp stage for the DAP and it allows iBasso to get creative with the sound output without having to reinvent the entire DAP wheel and force you to spend money on endless upgrades. It also dramatically lengthens the DX300 lifecycle and keeps it firmly in the audio public’s eye.
Tech Highlights
Discreet Design
This time around, iBasso has chosen to create a fully balanced discreet circuit design. And when we say discreet it is 100% as in both voltage and current stages so that means a Class A bias rather than AB push-pull or Class D.
But more than simply mimicking the characteristics of a Class A amplifier, it also manages the quiescent current very efficiently on low or no load and in doing so prevents horrible battery drain from the always-on state of a Class A bias.
On the voltage side, iBasso has put a lot of focus on circuit stability and reducing any potential transient distortion. Ideally, that means to you and me, a very black background, even with relatively sensitive monitors.
Do not forget also the inherent DX300 power supply design is split between the digital and analog side so AMP12, like AMP11 MK1, will still get a dedicated and stable 2000mAh li-poly battery further reducing the potential for noise and interference from the rest of the DAP circuitry.
Dedicated Balanced Line Out
Aside from the tonal quality one of the major differences from AMP11 MK1 is the balanced lineout on AMP12. As many are aware, the original AMP11 was in effect double amping from its LO 4.4mm, whereas with AMP12 you get a dedicated LO that bypasses the amp stage.
That should make a major difference with dedicated amplifier pairings such as the Cayin’s powerhouse tube amp, the C9, or dedicated desktop amps.
You also retain digital attenuation control on the DX300 so in effect this is a variable voltage output where volume is controllable both from the DAP and the connected analog amplifier.
Performance Numbers
The numbers on paper look impressive also. The AMP12 is definitely more powerful from its balanced PO and LO compared to the AMP11 MK1 at 8.3Vrms (maximum output) compared to 7.1Vrms original card rating for PO.
For LO, you get a desktop-grade 4.1Vrms compared to the 3.5Vrms maximum from the DX300’s dedicated 3.5mm SE LO. You can elect to turn on the LO from the DAP for AMP11’s 4.4mm balanced output at on paper 7.1Vrms looks a lot bigger but the signal is being coursed through the amp stage hence the same stat for both LO and PO from AMP11.
There is no equivalent for the AMP11 MK1 3.5mm numbers as the AMP12 is a balanced-only amp card.
The dynamic range on paper also looks excellent on the AMP12, particularly the new dedicated balanced line-out rated at -128dB compared to the AMP11’s LO which is rated 3dB lower at 125dB. PO dynamic range and SNR has also been tweaked upwards at 126dB from AMP11’s balanced 125dB rating.
AMP12’s potential for harmonic distortion and noise handling also seems much better for lighter loads compared to AMP11 MK1 at -107dB compared to 101dB on a 32Ω load.
Design
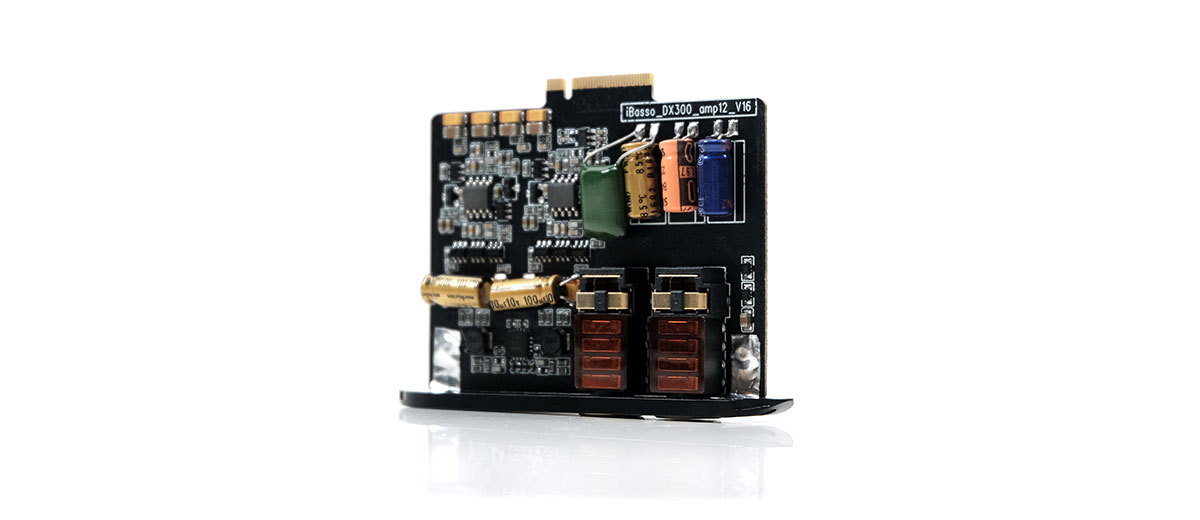
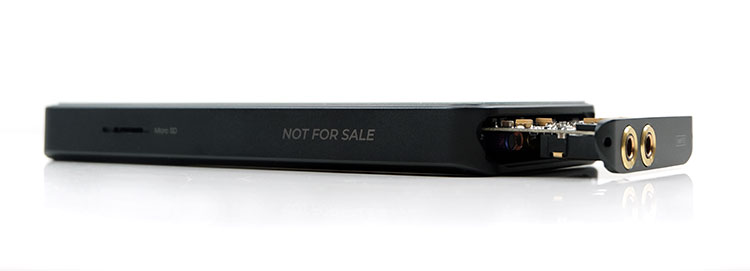
An amp card is not something that would inspire the equivalent to the ‘Dead Sea Scrolls’ in terms of design discussion. Almost 90% of the card is inside the DAP itself as it should be with just the I/O flush to the DAP chassis to create a single continuous unit. You will not see a design score from us on this type of product.
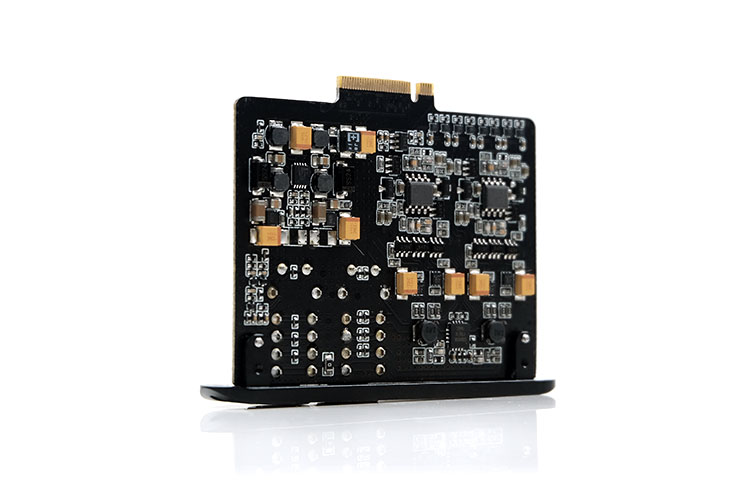
However, there are some differences worth pointing out to the older AMP card system from the DX2XX series. The first, this is a largely unprotected amp card as in no protective metal housing save for the front output plate.
Understandable given its most of it is protected by the DX300 chassis in the first place but do be careful when not in use in terms of handling and storage as it not as well protected as the older cards.
That does means AMP12 is a lot lighter than the older DX2XX amp cards as well as having a lower but longer physical form factor. The screws are moved to the front plate, (where else could they go?), and are still incredibly tiny so be careful when taking them out or putting them back in as they are very easy to lose.
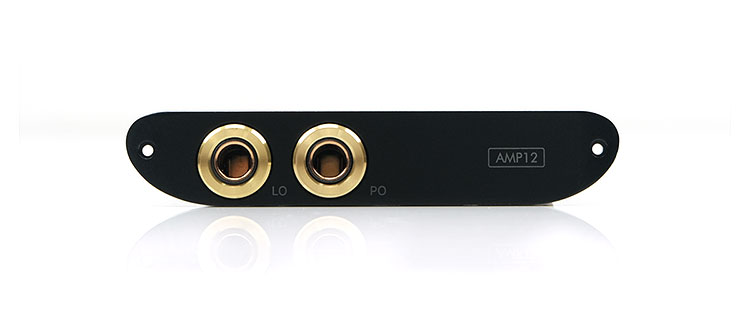
The front plate is adorned with two gold-plated 4.4mm pentaconn ports with each one dedicated for LO, (left) and PO, (right). I would say I would have liked the labeling to be a bit brighter for my tired old eyes. Under dim lights, they are a bit hard to see and you do not want to stick a sensitive IEM into the wrong port and hit play.
Installation
Installing AMP12 works pretty much on the same basis as the previous DX2XX amp cards except this time the screws have switched from the side to the front plate. iBasso has supplied a small black T3 Torx screwdriver to get you installing out of the box.
Just a few things to be aware of when installing aside from the screw size. This time around there are two little indents at the base of the AMP12 front metal panel to allow you to get a grip and pull out the card smoothly. You will find this a common feature on all the cards including AMP11.
The second is the insertion process. The exposure internals of the card are on the underside where the majority of the cavity space it. Simply find two grooves on the inside of the chassis and slide the card along them being careful not to bump the card components on the DX300 housing when you do. Make sure it’s flush to the DX300 chassis then screw it all back in.
I would suggest also ensuring you have the latest firmware downloaded in case of any compatibility issues with the different amp cards. When you do power up you will notice that the DX300 drop-down menu loses the LO/PO option that is present when using AMP11. That makes sense since you now have dedicated outputs on each AMP12.
Battery Life
Surprisingly better than what I was expecting given AMP12’s enhanced power rating and balanced -only discreet design. Compared to the original AMP11 I actually felt the analog battery drained at a slightly slower rate with maybe around 13-15 hours easily achievable on low-gain with lighter PO loads.
You should be able to get a bit longer on LO also but do expect a drop on those numbers with larger loads or more cans that pull more on the voltage and those that require high gain settings.
Packaging & Accessories
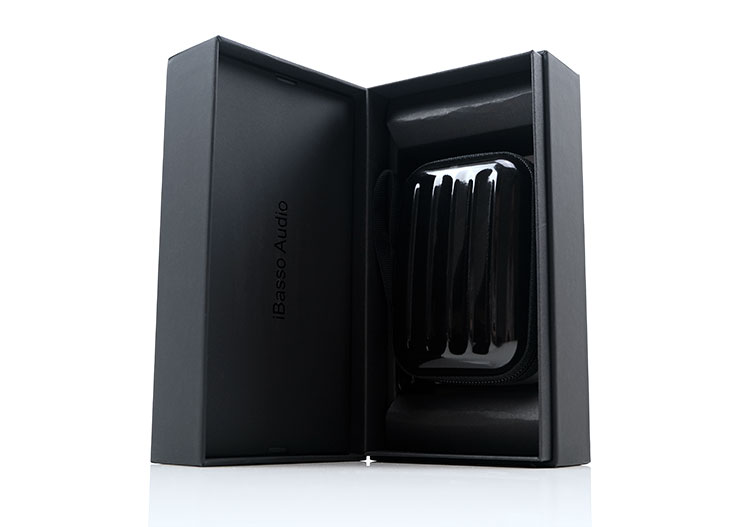
Packaging for the AMP12 is much more eloquent and ambitious than the previous DX2XX card system. For one, the box is bigger with the latest grey-toned iBasso branding. There is a reason for the bigger box because it houses a lot of accessories I wasn’t expecting.
Upgraded Cases
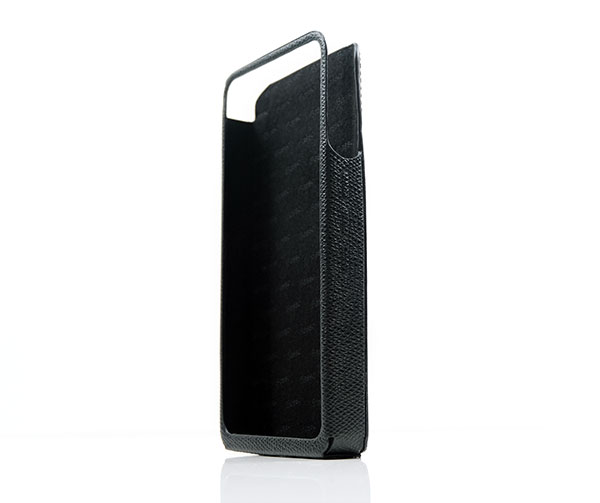
The first big surprise is a new Italian leather case for the DX300 itself. As you may remember I did mention the original blue version that came with the DX300 was a bit on the loose side. The new black version is a much better fit on all sides and keeps the DX300 very snug and secure with easy access to all the controls.
The second unexpecting inclusion is a small carry case for the AMP12. The package does come with the AMP12 already static bag wrapped inside the case and it does fit quite neatly. I suspect you could house an additional card there without any issues if you keep all cards in static bags.
The carry case’s outer is a tinplated steel facade so it retains its rigidity quite well with enough stretch from the central fiber zip lock. Think of it as a mini hard shell travel case and you are not too far off on how it works.
The final noteworthy accessory or should I say essential accessory is the Torx T3 screwdriver which is fairly basic like the DX2XX version. I would have loved to have seen a grippier version with an independent rotating grip.
Click on page 2 below for Sound impressions and Synergy


