Software Impressions
Platform
The N3 uses a system on a chip or SOC platform for its Hiby Music custom software delivery (Ingenics XBurst1). For those using the N5 or N6 the architecture is actually very similar and follows much the same UI functionality. In fact, this SOC platform is widely used on entry-level DAP models in one form or another due to its matured stability and excellent speed.
It is not an app or WiFi capable, it is not as advanced as the touch-based i5 Android platform but it is not as power or memory hungry as the i5 either. This is a pure DAP platform with additional BT functionality via its BlueCore CSR8811 module.
Speed
Boot Times
Boot-up time is still a bit on the slower side at 15 seconds compared to the N5 and N6 which booted in around 9-10 seconds. It is much faster than some of the new Android-based DAPs. For instance, it is around 10 seconds faster to boot than the i5 and 30 seconds faster than the FiiO X5 3rd Gen.
Power downtime is much the same levels as the N5 and N6 at 2-4 seconds max compared to the slower Android platforms which can take a few seconds longer.
Scanning
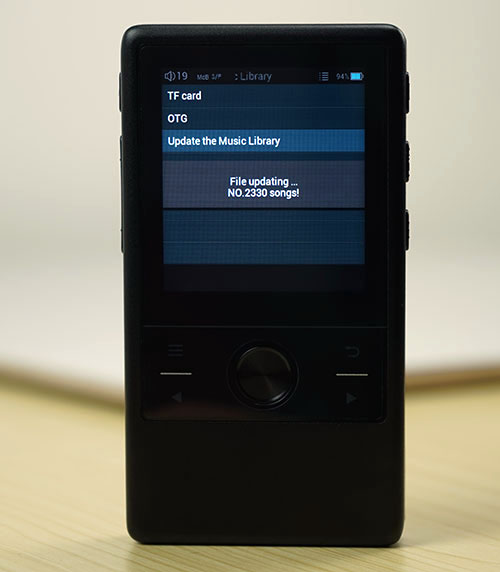
Scanning times were equally impressive though again not quite as fast as the i5. 2400 16BIT Flac tracks loaded onto a 64Gb Sansdisk microSD card took approximately 63 seconds to be scanned and entered into the Music Category database.
By comparison, the i5 took around 20-25 seconds though the FiiO X1 Gen 2 took a whopping 10 minutes for a similar process. Once updated, navigating the library was reasonably snappy with no noticeable lag between browsing, selecting, and playback starting
Features
There are 3 groups of software features on the N3. Those that deal with media management, features for settings, and those that deal with connectivity. If you have owned or used the N5 or N6 you should be familiar with the media management and settings tools.
However, the connectivity features are relatively new in this OS platform due to the additional functionality of the USB-C output as well as the new BT aptX capable 4.0 module.
Media Management
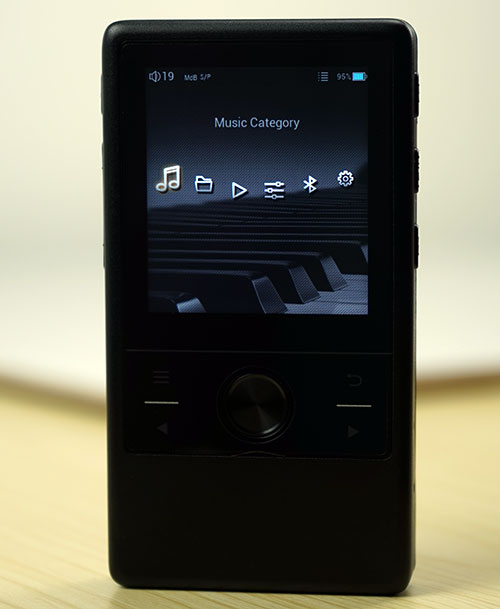
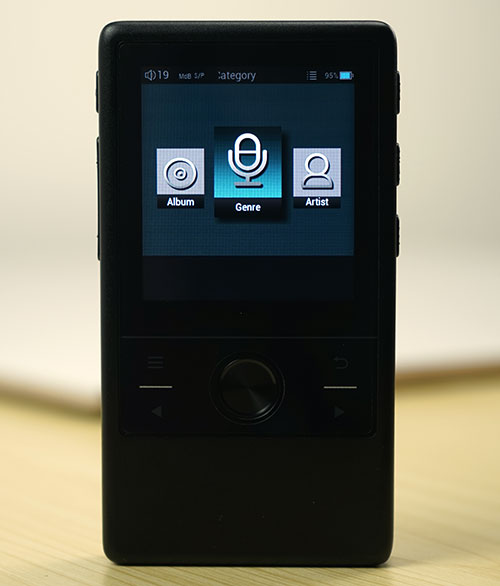
This begins with a fairly familiar home screen on the N3 offering you 4 specific media management settings as well as one general setting option where some media management settings can be tweaked.
The home page itself is a linear navigation system from left to right or right to left operated by the capacitive buttons below the screen. Again, previous Cayin DAP owners will understand intuitively what each will mean but for first-time users, you have Music Library, Music Category, Playing Now, and Music Settings as your 4 main areas of media control.
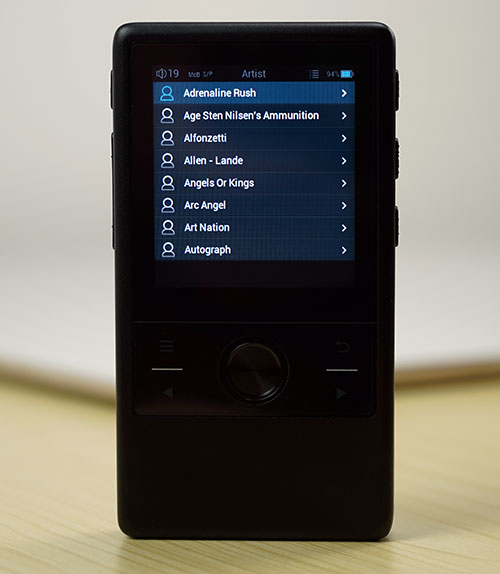
Music Library & Music Category
Both essentially do the same thing and that is to allow you to browse your music files and select the desired track you wish to play. They differ though in terms of how the media is filed and presented.
The Music Category is your classic tag-driven media management tool and will show up once you have opted to update your music library. The weird thing I have always found about this OS is that the updating or scanning option is not in the Category menu but in the Library menu where the tag-driven database is not accessible.
Category Titles
Once your database is built (remember 63 seconds for 2400 FLAC tracks) you can opt to drill down into your media via a scrolling list of subtitles that appear the moment you select the Music category. These include: songs, my favorite, recently played songs, album, artist, genre, and playlist.
Genre Drill Down
The drill-down organizational mapping of the Music Category is something which I have long been a bit of a critic of since the same traits are inherent in almost every version and that is the genre category’s lack of organization.
It is not new in this OS and I am not 100% sure this will ever change but if you have tons of songs under one genre you won’t see any artist>album>song organization for faster track selection.
Rather you simply get one huge long list of songs by title with no indication of which artist or album it belongs to. Thankfully there is a better drill-down organization in the artist and album category.
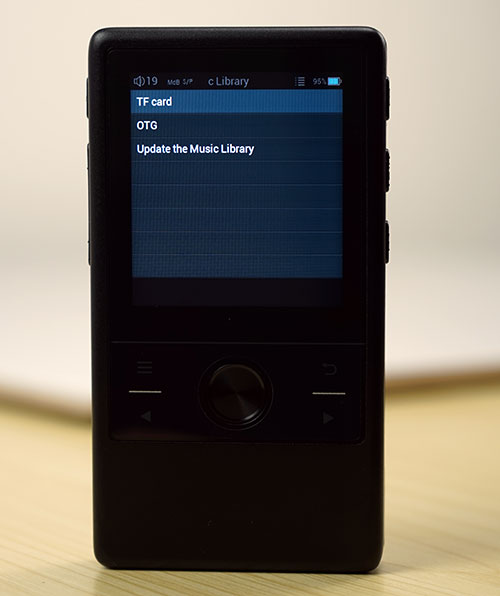
Music Library
The Music Library is your basic file explorer for memory cards and OTG flash disk or external power Hard drive sources. This is going to be incredibly useful if you are OCD on file naming convention and folder management or entirely useless if you rely 100% on tag management.
It does, however, avoid the need to update your library since it is a live display of what’s on your memory cards.
Settings
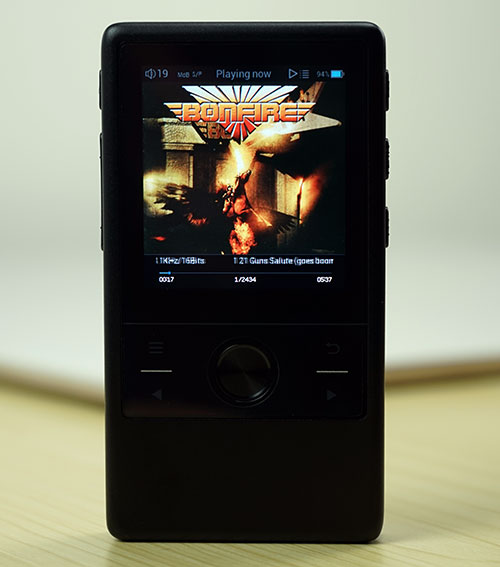
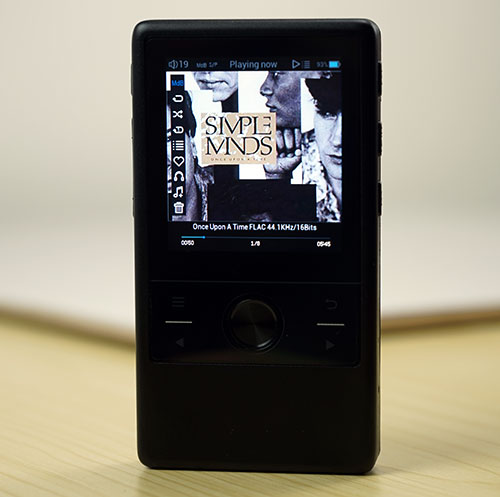
There are two main settings controls on the N3. The Music Setting category and the System setting category. Both can be accessed via the home menu screen from boot up but some aspects of the Music Setting category can be called “on the fly” from the playback screen menu.
‘On the Fly’ Settings
During playback, you can press the top right capacitive button to bring up a short list of actionable items on the left side of the screen. Options include a gain control, track deletion, headphone or line out control, playlist tweaking, and adding to your favorites.
It is not a new feature and has been deployed before on the N5 and N6 but my one comment is that it stays on the screen for a very short period of time meaning any hesitation and you have to call it back up again. A future firmware update should change this to a “button to call up the list” and the return button to terminate the list when finished.
Music Settings
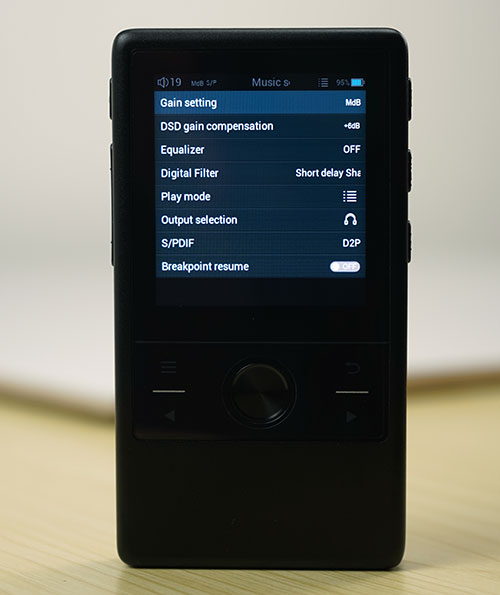
Accessible from the home page, the music settings category controls the majority of the tonal tweaks you can apply to your tracks during playback. These include options such as gain for lossy and lossless tracks, a customizable 10-band EQ, the DAC digital filters, output to a headphone or line out, SPDIF for DoP or D2P, gapless and volume controls as well as lyrics on or off.
Three Levels Of Gain
One new feature to note in the gain control is the 3-level gain feature which goes beyond the usual high and low options I have seen in previous iterations of this OS.
Now you have a medium gain setting as well as a high and low gain setting giving you a bit more control on voltage output in the N3. This will be particularly useful for the wide range of IEMs in the market today from super-efficient Andromeda’s to 300-ohm earbuds from VE.
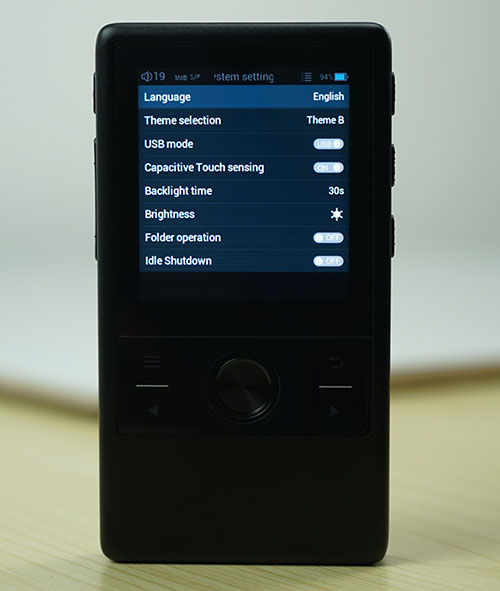
System Settings
These are generally the core settings of the N3 itself and covers most operational features such as language, themes, LCD brightness, capacitive haptic feedback, and power-related options such as idle shutdown and scheduled power off.
You can also elect to upgrade the firmware from the system settings and check the existing firmware and BT address from within the system settings. For those wishing to use the N3 as a DAC, you can also control that feature from within this category.
Connectivity
There are two main options for connectivity via this OS and that is wired (OTG and USB-DAC) and wireless (BT 4.0 aptX).
Wired
OTG
Wired, including OTG is heavily integrated already into the N3 OS and will automatically show up as a searchable drive under the Music Library/OTG option the moment you plug in your flash drive or HDD. Any OTG cable will work so long as it is terminated with USB-C or you have a USB-C converter tool. These are cheap and easy to acquire costing less than $5 in most outlets.
Duplex Bluetooth
What I love about the N3 BT connectivity is the duplex service and the capability of delivering an aptX 4.0 level BT signal. This was a classification level that for some odd reason was left out of the mid-fi i5 and something which is not offered on competing DAPs such as the FiiO X1 2nd gen.
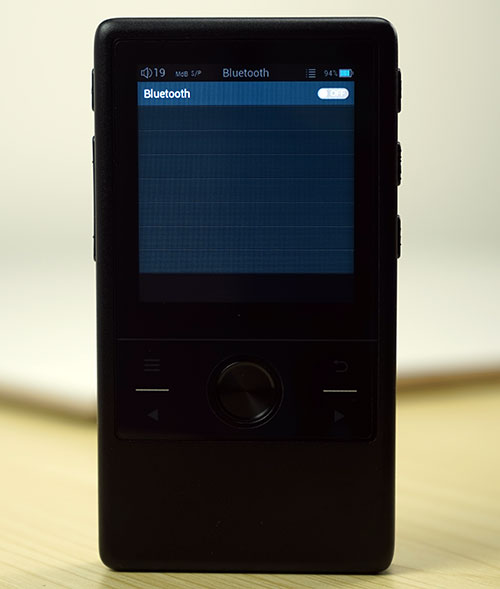
Wireless DAC/Amp
Also, not only can you connect to the N3 via a BT headphone or earphone you can also connect to another source via BT and transmit audio to the N3 from that source. Hence the concept of duplex or going each way.
On the software side setting it up to transmit BT aptX 4.0 is pretty simple. You can access the Bluetooth module via the home page BT option and set up whether to transmit via aptX or not on the same screen once the pairing is complete. The only frustrating aspect of this process is the need to reboot once you have paired and selected the aptX service.
Controls
Once paired with the N3 your mobile phone (ZTE Axon 7) will show the N3 as a BT-connected headphone whilst the N3 itself will show a blank screen with the BT logo. From there simply open up your music app on your remote sources such as your mobile phone and press play. All being well the N3 should play your source file.
As a little bonus, the N3 hardware buttons will control source playback. So by pressing play/pause back or forward on your N3 right-sided hardware buttons gets the required response on your source platform (e.g. smartphone). Kind of like a remote control, pretty cool!
Editorial Notes On Firmware
For this review the N3 firmware was V1.0, there will be a new Firmware out April 7th, 2017 (V1.1) and will include the following:
1. Add a new ReplayGain function to normalize the output level of different recordings, making sure the volume output will maintain at the minimum difference.
2. Add two sets of UI themes, users can now select their preferred theme from the System setup menu
3. Support multi-channel WAV format
4. Allow the user to terminate Bluetooth scanning by the Return key.
5. Set volume to maximum and disable volume control when N3 DSD output was set to DoP mode, and N3 is in digital output operation (S/PDIF and USB Audio). When the player falls back to other operation modes (PO/LO), the system will reset volume back to the previous setting and enable volume control again.
6. Enhance file selection mechanism of shuffling playback mode
Click on page 3 below for Sound Impressions & Comparisons