This review covers the Ferrum OOR which is a powerful solid-state headphone amplifier capable of 8W of output power into 60Ω load. It is priced at $1995 with the HYPSOS PSU priced at $1195.
Disclaimer: This is a sample sent in exchange for our honest opinion. Headfonics is an independent website with no affiliate links or status. We thank the team at Ferrum for their support.
To read more about Ferrum products we have previously featured in Headfonics click here.
Note, that this article follows our latest scoring guidelines which you can read up on here.

Poland’s Ferrum is an entirely new brand for us here at Headfonics but one that got a lot of exposure at some of the recent, albeit rare, audio shows with the launch of their new top-of-the-line OOR headphone amplifier.
In truth, it is their first and only headphone amplifier to date so it’s a flagship by default. However, at $1995 it is certainly being pitched alongside some of the more established amplifier makers out there.
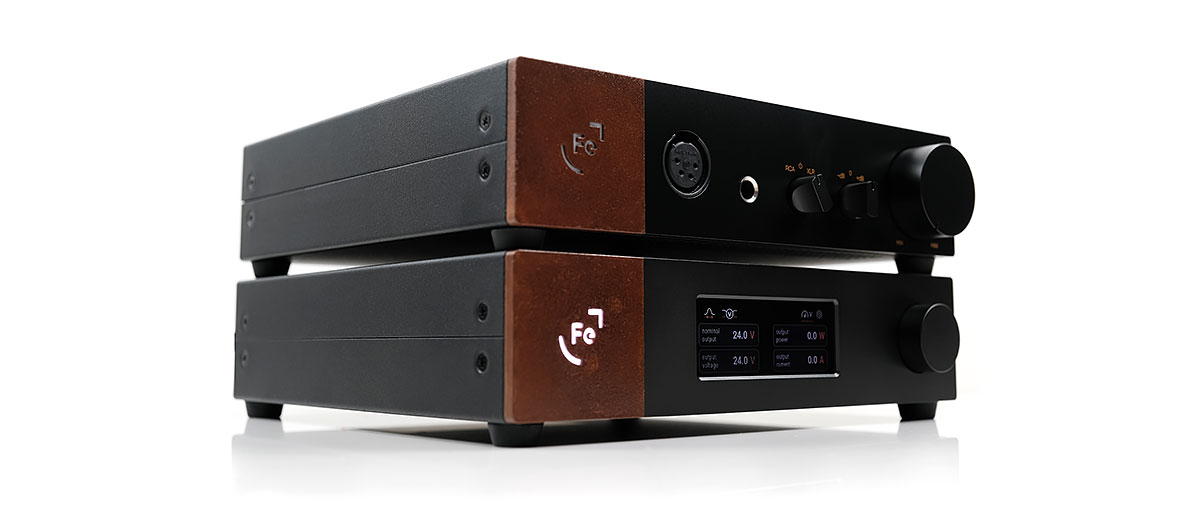
What makes the OOR unique is the inclusion of the HYPSOS. This is essentially a dedicated linear PSU component that stacks neatly under the amplifier.
However, there is more to it than that, much more. You can buy each one separately but combined, the OOR and the HYPSOS make a pretty formidable and flexible ‘audio system’.
Tech Inside OOR
The OOR headphone amplifier uses a fully balanced analog circuit design offering both balanced and SE inputs and outputs. It can also act as a balanced preamplifier with volume and output control as well as offering bypass capability to act as a standalone headphone amplifier power stage.
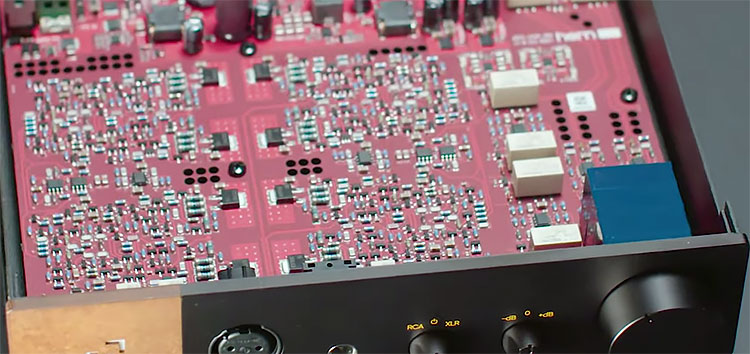
The power amp topology is a modified Class AB design and completely discreet meaning zero integrated circuits and using transistors instead. This allows Ferrum a lot more engineering control over the precise parameters of the OOR’s output performance.
Volume control is also in the analog domain with the OOR using an Alps RK27 “Blue Velvet”. These are classic or well-known high-end potentiometers with excellent wiper contact and usually a very long useable life span.
The Blue Velvet pots also normally come with inter-channel matching within +/- 2dB so despite being in the analog domain, the OOR should sound quite balanced for channel matching with sensitive monitors on low volume.
The final key feature is the Ferrum Power Link (FPL) denoted by the Weipu DC coupler at the back of the OOR.
This is a Weipu SF12 Series coupler designed to connect with the HYPSOS PSU system and wired 2 x 2 with two wires for power and the other 2 for feedback to ensure the voltage remains stable or flat during use for optimal audio performance from the OOR.
Performance Numbers
The headline numbers from the OOR look very promising indeed with a maximum output rating of 8W into 60Ω balanced and 2W into the same load when using the single-ended output.
I am not privy to the precise power shaping curve of the Class AB circuitry inside but it is possible it peaks at 8W and then drops and allows for more current delivery as opposed to voltage for lighter loads around 32Ω. Or it might simply go higher and I have heard that it might be even higher at 10W into 32Ω.
Either way, this is ample headroom for demanding planar headphones such as the original HIFIMAN HE6 and newer models such as the Diana Phi. High impedance dynamic driver headphones get some love also with a maximum of 1.6W into 300Ω which will work quite nicely for the HD800 and the lower-tier HD600/650 series.
The quality of that signal also looks equally impressive with a rated THD+N of 0.0004% which is lower than flagship amps such as the Xi Audio Formula S rated at 0.0006% and Violectric’s classic V281’s 0.00079% measurement. The noise floor dB rating is also equally competitive at -105dBV or slightly lower than the Formula S.
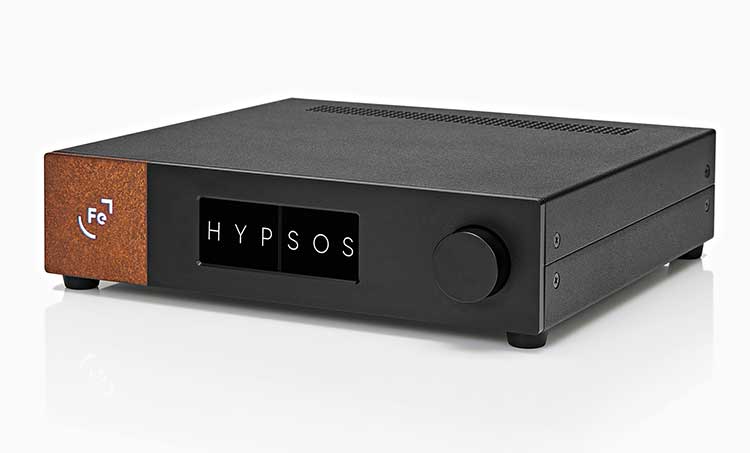
Tech Inside HYPSOS
The HYPSOS is perhaps the secret sauce that turns the OOR from a very good amplifier into a great amplifier. It is not a mandatory purchase since the OOR can work just fine on its own but it will give you superior performance with the ability to even fine-tune that performance.
Technically, HYPSOS is a hybrid power system so not just a linear PSU but also has elements or some advantages of a switching power supply. Its functionality also extends beyond the OOR so do not think of this as an exclusive combo.
In fact, when powering up the HYPSOS you can select from a very wide range of audio components and it will select a specific set of pre-configured power parameters to match and drive that component.
Ferrum has also provided variable voltage parameters for each pre-configured setting which you can adjust to affect the OOR audio performance. This is called SST or sweet spot tuning.
Should your device not be on the extensive pre-configured list you can also manually adjust the settings to match your chosen device. Ferrum also includes a number of Weipu-designed connectors to allow you to connect to devices that do not have a dedicated coupler connection.
Topology
The HYPSOS is rated for between 5V to 30V and can power any device, including the OOR that requires up to 6A of DC input voltage. It uses an initial input two-stage filter and then switches to the correct output voltage for your setup, before going to the transformer output.
From there it is filtered through the circuit and a low drop-out voltage regulator to ideally produce a very consistent or flat low ripple and noise power supply to the connected amplifier.
In fact, the choice of both circuit design and the Weipu coupling system is seen as a singular service called 4TSD or a 4-terminal sensing design.
This is basically a sophisticated impedance measurement system via two sets of wires (same 2 x 2 as the OOR connector) at the output to ensure the exact voltage level is delivered at the point of contact with the amplifier.
Design
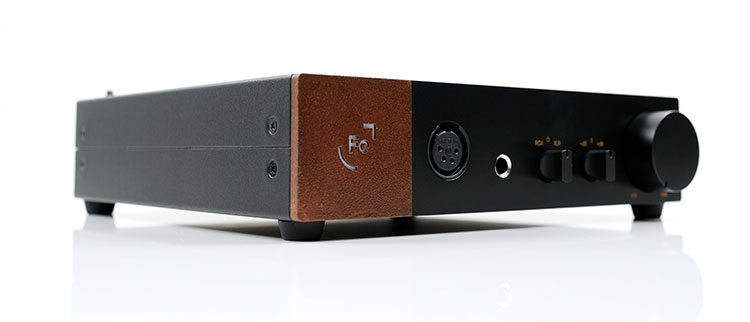
The OOR is actually quite a compact unit measuring 21.7 x 20.6 x 5cm in dimension and weighing just 1.8 kg. It is not a design you need plenty of space for and can sit very comfortably in a fairly tight office or desktop space.
Despite its fairly industrial boxy form factor, the aesthetic is well above average with a dash of terracotta accenting an otherwise mix of textured corten steel and a matt black aluminum front panel.
That is not just a splash of ‘dark orange’ paint either, the accented texture is also different with a slightly rougher feel compared to the rest of the build, much like an interior-designed decorative tile. The Ferrum insignia on the front panel also lights up with a degree of brightness controllable through a rear dial.
The OOR stability is excellent also with 4 grippy rubber feet stoppers on the base with venting to the rear of the top panel. I/O is to the read and PO, gain, and volume controls to the front.
The HYPSOS matches the OOR in every way save for differing sets of controls and a central LCD panel for information readout and settings control. Its dimensions are the same which makes it supremely stackable with the OOR though the weight is heavier at 2.8 kg given it uses a heavier transformer inside.
I/O
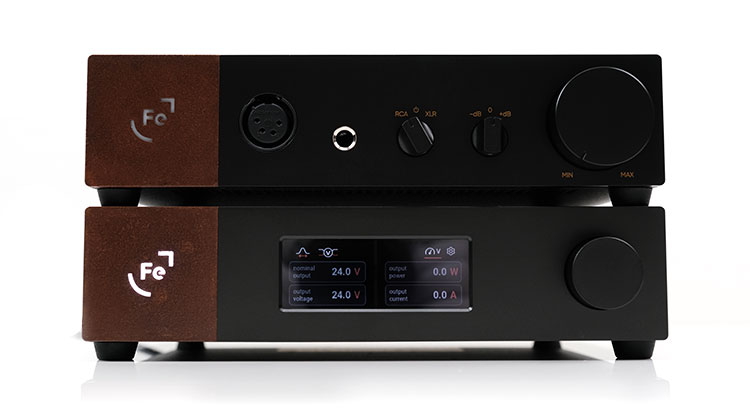
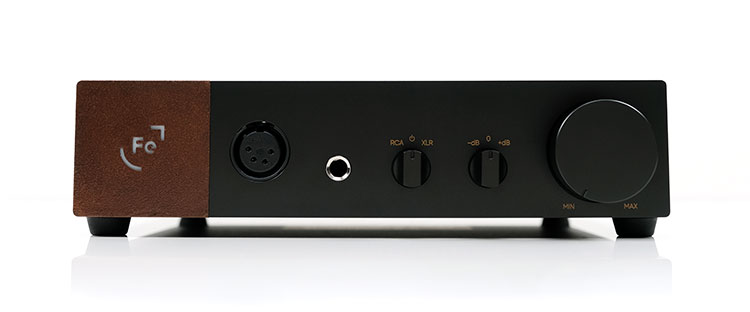
All the I/O on the OOR is analog and all are located on the rear of the unit itself. The PO, gain selector, and volume control are housed on the front panel.
There is also an input selector on the front panel to allow you to switch between balanced and single-ended signal inputs. The lighting control on the OOR emblem is adjustable via a rear dial just underneath the bypass switch.
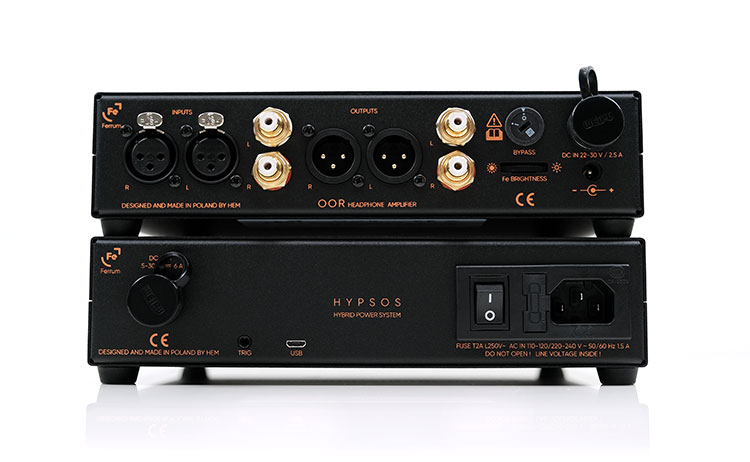
Save for the bypass and Weipu DC coupler the connection options are fairly standard for an amplifier with preamp output. You get dual 3-pin XLR inputs for accepting a balanced input signal and dual RCA for unbalanced.
For the preamp duties, you get the same options reversed with a dual male 3-pin XLR socket and dual RCA output for going single-ended. The bypass switch is a binary 1 and 0 with the setting on 0 or off for safety purposes. If it is switched on you get the maximum voltage in a fixed setting and no volume control from the OOR.
The HYPSOS is much simpler with just three I/O options to the rear. The 4TSD-capable Weipu coupler with a dust protection cap, a BCS trigger input/output socket (software-controllable), and a single micro-USB port.
The trigger allows you to connect the HYPSOS to another trigger-compatible device and in turn, this can allow the HYPSOS to power up and wake up the other unit. Since the HYPSOS firmware is upgradeable that’s where the micro-USB socket comes in to allow you to connect the unit to your PC and update via the Ferrum-supplied app.
Controls
OOR
The OOR controls are entirely switch-based though you can do an auto-start option for the amplifier when you turn on the HYPSOS if coupled. That tends to be my preferred route when the two are paired together.
The three-stage gain function switch works in dB increments and is split between balanced and unbalanced. Going balanced you can opt for -4 dB, +6 dB, or +16 dB, and going single-ended you get a lower level of -10 dB, 0 dB, and +10 dB. Ferrum does recommend you start with about 25% volume and one of the low gain settings and work your way up from there.
The input selection is very straightforward, you choose between balanced or unbalanced so neither will operate at the same time plus you have an option to power off completely in the middle.

HYPSOS
Now, this is controls get a bit more in-depth with an LCD-based display and a rotary dial to the left which controls your ability to navigate and execute the options within the OS on display. It is a relatively simple OS actually but very cleanly designed and easy to navigate.
The initial power-up will not take you to the home screen straight away but instead give you several pre-configured options to get you started with the paired audio component of your choice, which in this case is the ORR.
Simply scroll through until you find Ferrum OOR then hit select, wait 10 seconds for the HYPSOS to ‘power up’, and then the OOR will turn on.
Once active you have a standard home screen from which you view your voltage, current, and power output readings. The values should also be consistent or unchanging unless you are using the sweet spot controller to fine-tune the voltage yourself. In my case, it reads 24V, 14.8W, and 0.6A.
SST
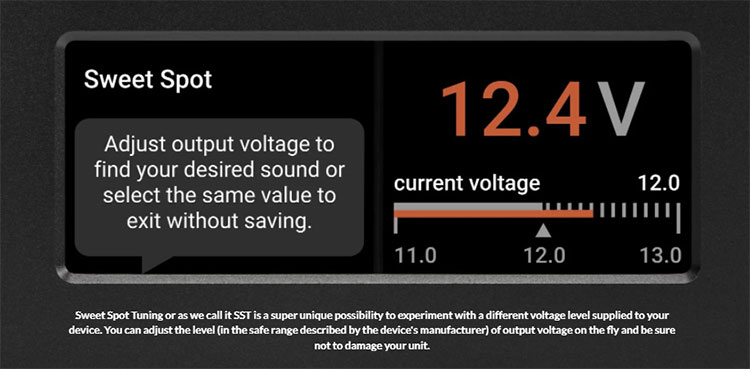
To the far right, you have two controllable options, the voltage control which is the SST, and a cogwheel which allows you to dig deeper into a lengthy list of other adjustments.
The SST option will present you with a range of voltage values that are preconfigured to your component. That range is the amount of playable voltage your unit such as the OOR can handle without any damage. In the case of the OOR that is between 22V and 30V, for others, it may be higher or lower.
I will not go into too much detail here on the effects of varying the voltage with the OOR. For that, you can flick to page 2 for sound impressions but the short story is lower for looser and softer and higher for faster, cleaner, and more dynamic.
Too high might give it a shrill and unpleasant overtone but that depends entirely on your system and headgear being paired.
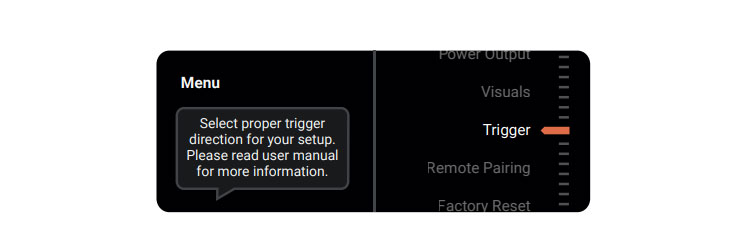
Menu System
Lots of interesting options here including the ability to reset your pre-configured component match to a different unit or manually set up your voltage controls to suit an amplifier you know well but not on the pre-configured list. You can also adjust the trigger controls as well as turn the 4TSD controller on and off.
Why would you turn off the 4TSD? Well, it also creates a nuanced effect on the sound quality creating a slightly weightier tone when turned off. Turned on, the dynamic range and resolution should improve.
You can go deeper with options like a Spread Spectrum mode which is a switching frequency modulation function that fine-tunes your amplifier’s high-frequency response.
You would think a remote control would be very suitable here if you are operating a HiFi setup or fancy leaning back in your Eames chair rather than standing hunched over the unit constantly tweaking. Sadly, no remote control is included.
You might think surprising and yes for me it is a little but there is some compensation with the ability to sync with an Apple TV remote either on an iDevice or via a physical remote which I gather you can get quite cheaply.
Packaging & Accessories
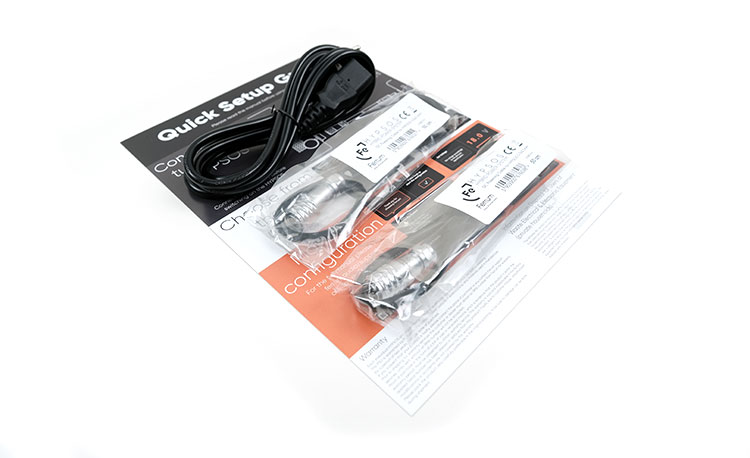
Packaging for both the OOR and the HYPSOS is functional but aesthetically very professionally done with matching black and orange color schemes on the outside and plenty of protective foam packaging on the inside to protect both the unit and the accessories.
The accessories list is important to know and understand, particularly for the HYPSOS. With the OOR you get a stand-alone 100/240V AC to 22-30 V DC switching power supply should you wish to go without the HYPSOS.
You also get an additional Weipu coupler if you intend to stack with HYPSOS and a quick start-up guide.
With the HYPSOS you get a standard 3-prong mains cable but also the choice of one of two additional 4-pin to Weipu DC coupler cables at the checkout: a 5.5/2.5mm termination and another with a 5.5/2.1mm DC jack.
These will allow you to connect the unit to alternative amplifiers or DACs that do not have a coupler system.