We review the PLOOPY Headphones, which are boutique 3D-printed open-back planar headphones with a unique EQ’able DAC and amplifier. It is priced from CAD$129.99 with a fully assembled kit retailing for CAD$254.99.
Disclaimer: This sample was sent to us in exchange for our honest opinion. Headfonics is an independent website with no affiliate links or status. We thank the team at PLOOPY for their support.
To read more about the HIFIMAN products we have previously covered on Headfonics click here.
Note, that this post follows our current scoring guidelines which you can read in more detail here.

I guarantee you will never hear a name quite like PLOOPY, and in any industry not just the audiophile market.
This is a Canadian boutique firm formed in 2019 by two brothers, Colin and Phil Lam. When I say boutique I mean in its purest of forms; small, agile, responsive, and uniquely open source rather than proprietary for much of what they produce.
In some ways, that approach is reflected in the launch of the PLOOPY headphones. This is a very affordable set of open-back planar headphones priced at well under $200 USD depending on the format you can buy.
However, it’s not the price point that makes this one of the more interesting products in the portable audio scene right now but rather how it is pitched and sold.
This is a 3D-printed headphone in part, mixed with easily obtainable materials and including a manual on how to make them yourself with your 3D printer. It is accompanied by a uniquely constructed DAC and amplifier that houses open-source software to allow you to fine-tune the sound signature.
In short, the PLOOPY Headphones is more than a product, it is a self-sustaining community-driven project as well as an indirect medium for learning about how to use PMEQ.
It is also a product that improves organically with a continuous line of feedback from online communities such as Reddit as well as frequent firmware and PMEQ recipes posted in GitHub.
Tech Highlights
The PLOOPY headphones are a set of 3D-printed wired open-back planar magnetic headphones. It comes with a small opamp-driven single-ended integrated DAC and amplifier with integrated software and is based on a Raspberry Pi system.
You can buy the PLOOPY headphones and amplifier in various states of ‘undress’ with the completely disassembled version being the cheapest at CAD$129 right up to a full-assembled version which is the most expensive at CAD$254.
We went with the fully assembled version for this review but even that will require a few insertions here and there to get them fully functional.
Both headphones and amplifier should be seen as a single-integrated package or system designed to plug into your PC or MAC for audio playback.
However, it is the DAC/Amp that is software-driven giving you the ability to fine-tune the sound signature via 3rd party software such as the one provided by George Norton on GitHub. The amplifier is also firmware-upgradeable from PLOOPY’s repositories on GitHub.
Driver
There is not a huge amount of information concerning the driver size or precise materials used for the PLOOPY Headphone drivers in one convenient location.
What I can tell you is that the driver lacks a bit of sensitivity at 70 dB per mW though it’s efficient enough at 20Ω for impedance.
The magnet array consists of a single-sided 6-piece implementation with a thick but small diaphragm for a modern planar. The diaphragm is about 400um thick and has an active area of about 1750mm^2. The traces are copper and about 35um thick.
This is not a sensitive driver. Despite its relatively efficient 20Ω rating you are going to need some decent power to drive them and set up in such a way as to prevent potential clipping. One thing to note, the PLOOPY team did recognize that these headphones are not massively loud, (without distortion and clipping).
Thus, to get the balance right you do need to work the headphones through the accompanying DAC and amplifier where gain control, (as well as EQ), becomes a must.

Amplifier
The stock DAC chipset inside the accompanying USB-power DAC/amp is a Texas Instruments PCM3060 which can do a maximum of PCM 24BIT/96/192kHz sampling rate but in this instance, PLOOPY went with PCM 16BIT/48kHz so a higher rate track will be downsampled by default.
Since it is open source you can change that and indeed in the George Norton constructed PLOOPY Headphones Toolbox there is a codec configuration option for oversampling up to 32BIT as well as introducing some level of digital filtering and a digital de-emphasis control.
You also get a level of pre-gain and post-gain control which I find essential for balancing power and volume to prevent clipping and distortion in its performance with the PLOOPY Headphones.
As mentioned, the controller chip is based on a Raspberry Pi, (RP2040) so it is not the most powerful of chipsets but it is fast enough to run the EQ options that come with the Toolbox software.
For amplification, it uses 8 Texas Instruments OPA1688 opamps in parallel per channel and outputs a maximum of 2W into 20Ω per channel, with a max voltage swing of 14Vpp
Its gain level can vary slightly from firmware to firmware in terms of dB to mW headroom and I did mention that whilst audible, it’s not that loud, perhaps around 80 dB from the latest firmware, (additional 6 dB headroom), which is what I have been using for this review.
Of course, nothing is preventing you from using the PLOOPY Headphones with your own dedicated DAC and amplifier with more voltage and current in combination with other 3rd Party EQ platforms to create your own set of curves. This is open source after all.
Design
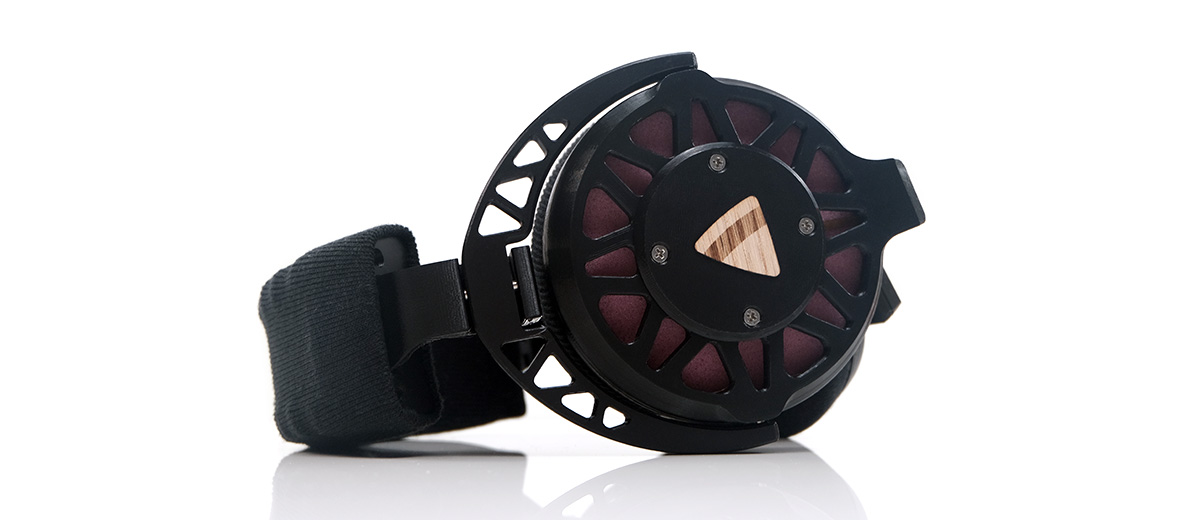
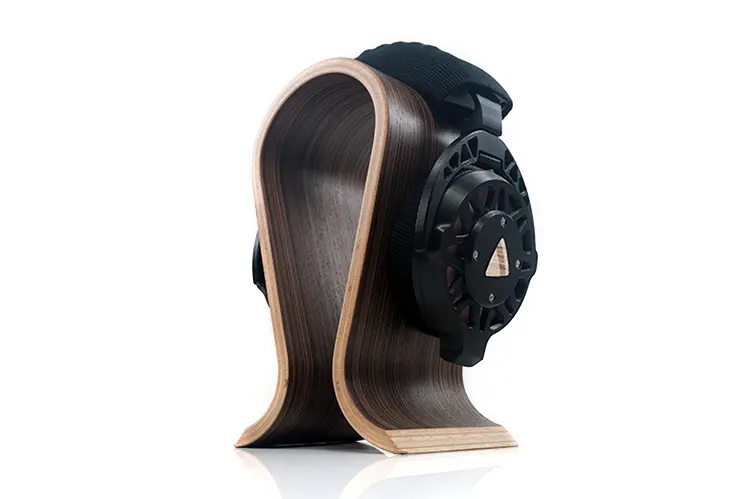
The PLOOPY Headphones have a very raw but useable 3D-printed build quality with a classic headphone round-cup form factor. The aesthetics are essentially DIY in nature but I suspect quite complex to build if you plan on doing it yourself using their available printing guidelines.
It’s quite a large 3D-printed plastic frame along with similarly styled ear cups. It also comes in three colors including red and yellow which do not appeal that much to me and this sample, which is in a far classier black. Beyond that, you get a mix of fabric for the pads, headband strap outer, and foam filling for the inner.
Because it is an open-back the front is quite exposed with no fancy grills, but rather plenty of lilac-themed foam protecting the main driver.
I am pretty sure the foam could be classified as a consumable and it’s likely you will need to replace that at some point in the life of the headphones. PLOOPY alludes to that with the inclusion of a ‘fresh kit’ consisting of the fabric covers and foam pieces for the pads and headband for an additional $29.99, (CAD).
The connectors form part of the printed cup and here PLOOPY opted to use 3.5mm TRS sockets rather than bulkier options such as Hirose or mini-XLRs. It does come with a stock cable but the connector system is not proprietary so you can fit it with any standard 3.5mm “AUX cable” of your choice.
The weight isn’t that bad for a planar headphone at 420g and without overlapping too much into the next section it’s a very comfortable and noise-free, (when articulating), headphone when worn on your head.
Comfort & Isolation
The PLOOPY Headphones are very comfortable for my head but a lot will depend on your head size and what FlexBar you install out of the box.
One of the main criticisms I can gather from early adopters focused on the fairly loose clamping force of the PLOOPY Headphones and yes, the later clamping pressure would be fairly relaxed.
However, the company did adapt to the feedback with the ability to choose 3 different size options for the fully assembled version.
The unassembled kit uses FlexBars that come loose in the box. The concept is you take the bar that best fits your head proportions and slide it into the frame to complete the build.
The bar is serrated or notched along the underside to allow you to use it as a headband adjuster. It works well with plenty of assured clicking noises as you move it up or down.
One note of caution; do not insert the FlexBar until it locks if you are wondering which version to use. It won’t be easy to get it off once locked.
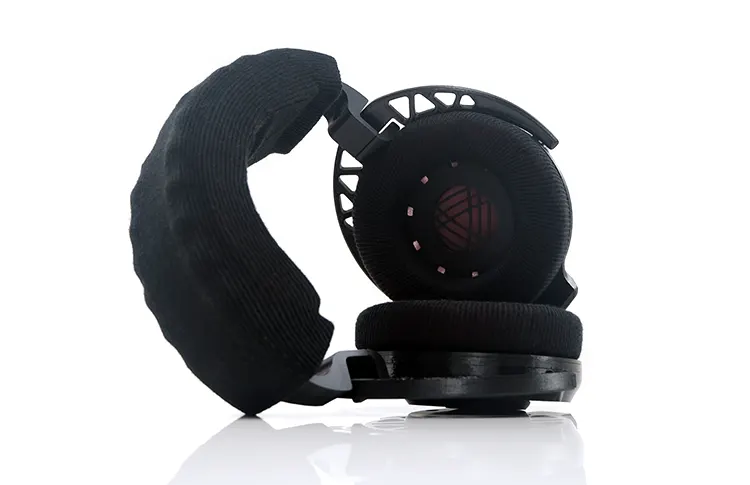
The loose version’s clamp is relatively weak and being a single-band style with fabric it can move a little on the top of the head. The comfort is excellent though with the cloth preventing potential heat from building up during long listening sessions.
The PLOOPY Headphones headband and pad fabric combined with a foam inner provides a very comfortable and itchy-free experience on my head and ears.
The swappable pad’s inner cavity is a traditional round shape but wide enough to accommodate most ear sizes. However, there is no fabric cloth to cover the cup enclosure with your ear pressing against printed plastic.

Stock Cable
The PLOOPY Headphones supplied stock cable is a single-ended design and terminated with slimline 3.5mm TRS jacks on both ends.
You get 2 TRS cables in the package with each one terminated with dual 3.5mm TRS and then an extension cable with female ports that merges both channels into one TRS jack for inserting into the accompanying DAC/amp or amplifier of your choice, (3.5mm compactable).
The connector terminations have no channel markings, however, don’t panic wondering which channel is which for connecting to the headphones. The drivers are wired to accept only the correct channel, and both channels are sent over both cables. That way, it doesn’t matter which cable you plug in, you’ll always get the right one.
That does mean, however, that you cannot cable swap with a standard SE or balanced terminated headphone cable.
If you do change to a cable from HIFIMAN for example, it will only output to one channel due to the channel wiring inside the PLOOPY headphones. Instead, you can cable swap using any standard 3.5mm “AUX cable”.
I presume the cable wire is an OCC copper though as to what gauge I cannot confirm. It is housed in a black fabric jacket with a twisted finish and a low-profile splitter for deadening on the channel merge near the base of the extension and an organizer curl on each supplied TRS cable near the top.
The twisting is fairly loose so I do find some kinks creep in from time to time during use but you can iron them out with a simple tug or twist. You shouldn’t find the handling too weighty either and being an open-back headphone microphonics is not an issue.
Packaging & Accessories
I will keep this one short because aside from the supplied cables and amplifier, you only get an additional USB-C to USB-A cable to hook up the DAC/amp to your PC or MAC if you buy the PLOOPY headphones pre-assembled.
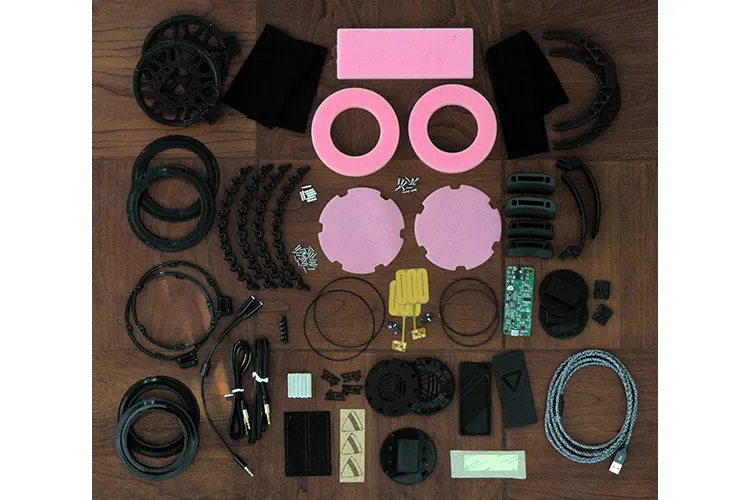
If you buy the unassembled kit you will get a fairly length BOM, (Bill Of Materials) which is essentially the PLOOPY headphones and amplifier’s parts broken down and ready for you to assemble.
Packaging is non-existent save for the courier box and vacuum-sealed bag it comes in to protect it on its journey to your address. This is for the pre-assembled version so I presume there is a bit more protection for the kit to prevent the more fragile components such as the drivers from getting damaged.