Over the years, I’ve received questions in high volumes about my Audio Technica ES-series headphones and thought it was time to write an article about them.
Audio Technica’s recent release of the ESW9LTD only made things worse for me after I reviewed last year; the floodgates were opened and I’d felt like I was forced to almost act as a support rep for the entire ES/W series portables. With that in mind, I felt it was time to do an ES/W portables series group review.
The following page chronicles my experiences with repairing a set of Audio Technica ATH-ESW10JPN headphones. The original owner took very poor care of them and I’ve decided to repair them to the best of my abilities.
After this, I will detail the sound characteristics of each model of the ES/W series from Audio Technica on the following pages of this article. If you don’t care about the Art involved in the traditional lacquering of the ESW10JPN, skip this section. It is quite long and filled with a lot of subjective experiences.
A Guide to Japanese Urushi Lacquer – My Artisan Training
Back in 2008 or so, Audio Technica released the Urushi Lacquered ESW10JPN and it was nothing short of dazzling to any fool with a mortal soul that looked upon them.
We all gazed into the abyss that year…and the monster in the depths below stared right back, forcing everyone to invest time into searching Google for more details. If you had taken up this quest for knowledge, you’d have quickly found yourself in the middle of a slew of nonsense posts on Head-Fi about this model.
There were too many threads that lacked any useful information, too many “Oh, these are good.” posts and similar empty opinions that only frustrate you more as time goes on, as well as posts from users who claim to have two of the rarest headphones around…but naturally don’t want to share a simple photo of them for proof of ownership.
Information
The lack of information on these models is so severe and some users who reviewed them are so clearly and vividly off-center with their views, that I had to gather the ES10, ESW10JPN, ESW11LTD, and the ES700 myself to discover if I was crazy.
I’d already owned the ESW9 for some time, so there was no need to purchase that. I’ve heard each model individually many times and rarely agreed with anyone who said anything about them, save for someone who happened to be a buddy of mine who goes by the user name Glitch3d…a previous owner of the ESW11LTD: a voice of reason amidst the insanity.
I bring this up because, after years of reading and scouring for more reviews and mentions of the ESW10JPN and the ESW11LTD, I’d always come back with more confusion and stress as time went on.
Nobody talked about EQ or efficiency, nobody tested with popular sources and amplifiers, or really at all touched on what they are capable of with different pads, where their limits are, what meshes with them, and why.
It baffled me and stressed me out so intensely, that I spent the last few years hunting for a used ESW10JPN and ESW11LTD to purchase for myself just to review.
Sellers
I finally found sellers for both and dropped a heartbreaking and wallet-crunching amount of cash. I got a hell of a deal on a near-mint 11LTD…but the owner of the 10JPN flat-out lied to me about their condition and it took almost 60 days for it to be imported to my location in the States.
I tried to dispute it, but Paypal said it was too late to do so and the owner got away scot-free after saying it was in A+ condition when the set was actually in F condition and severely battered upon delivery. That son of a bitch...
The Process of Urushi Training
After 8 years of gawking at the ESW10JPN and hunting for someone even remotely interested in selling one, that is what I ended up with?! I was so furious, that I contacted an artisan I found online that lived here in Cleveland, Ohio who said he had decades of experience with the Urushi art form.
I’d hoped he could help salvage or repair it for me. Instead of fixing it for me, he’d offered to instruct me on the art form enough to do it myself. Of course, I accepted and it only took a few weeks of lessons to raise my level of experience to the point of being able to start repairs on my ESW10JPN.
Toxicity
Japanese Urushi is a highly toxic substance that can leave slight burns and poison ivy-like effects if it comes into contact with your skin. Brushstrokes, mixing, and application processes need to be precise, the area of work needs to be dust/contaminant-free and the weather can’t be too harsh in either direction.
Failure to meet a single one of those requirements equates to the ruination of the Urushi curing process. I have a lot of woodworking and lacquering experience, but I’ve never touched this traditional Japanese Urushi lacquer before.
It needs to be imported from Japan and specific, custom-made brushes outfitted with mouse hair are the only acceptable source of application you can use.
Importing
Importing Urushi is a nightmare and costly, the real stuff anyway. You can get junk on eBay and elsewhere, but that’s not the good stuff…and I was only interested in the good stuff for my repair of the ESW10JPN.
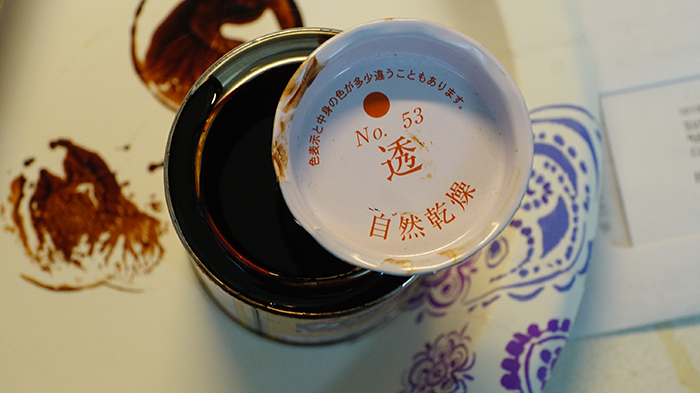
My new “Sensei” helped me import some real Urushi from Japan, as well as some proper brushes. Be careful if you buy online though because Japanese sellers don’t know English well and have no clue what the words “clear” and “transparent” really mean.
They list these terms on their products and you’d naturally assume it means colorless Urushi right? Nope. It means nothing and the substance is still dark. It will be based on color codes that the website or seller will provide in a pallet key form or image, so even if it says transparent and clear…it is the opposite.
Sellers on eBay and Amazon, as well as other sites in Japan, use these terms in the title of the ad and are not aware the product is not clear. Be careful. I wasted a lot of cash buying and importing Urushi while waiting for the real stuff to arrive, as I’d wanted to practice with the lower-end stuff and every single product I ordered was not as described in color.
ESW10JPN Design
It hurts on an emotional level that Audio Technica originally lacquered the Audio Technica ATH-ESW10JPN to a completely different color than what the wood cups were. They didn’t do a good job on the application and left a ring around the top of every cup they applied Urushi to.
The natural color of the 10JPN’s wood is of lighter coloration than the very dark stain and flat Urushi lacquer they used. The 10JPN’s wood has blonde highlights and a gentle rolling marble effect in the wood grain with deeper contrasting areas, immediately followed by darker ones.
I figured it would look incredible if I could sand both cups down to expose some of that amazing wood grain and then apply a fresh coat of Urushi for that candy-like visual appeal. The sanding process was extremely difficult and took a few hours a day to work around the lettering and logos with a fine-pointed sanding pen.
At this point, I’d stripped as much as I could off the original Urushi lacquer of the right cup and reapplied a lighter base. The result is shockingly beautiful. It looks like a deeper, more interesting 11LTD, but with a real Urushi glazed look. It is the stuff of dreams and I want to punch the previous owner in the face for taking such poor care of them. Bastard…
Black Cherry
The Black Cherry Wood of the 10JPN is gorgeous beyond words, but Audio Technica decided to cover it up completely with a darker stain and yet even darker lacquer, the end result is just the dumbest thing they could have done to it. They should have used a much lighter Urushi color, or even a 90% clear base instead. What a tragedy.
Fostex recently did the same thing with their TH900 headphone, they’ve even uploaded a video of the entire Urushi process for everyone to see. In that video, they applied a piano key black Urushi base and it looked so much better than the tacky red sparkles of the final product.
By the way, the Urushi application has to be done in single layers once a week or at the very least every 4-6 days for the duration of a few months. Audio Technica did this by hand for the ESW10JPN models, so I classify this as high-art and something to be respected and cherished.
Tradition
Tradition is wonderful and I feel like I am one of the few who understand the art and love required to use Urushi techniques after experiencing it all firsthand…but at the cost of destroying the natural beauty of the wood?
No way! Not on the Audio Technica ATH-ESW10JPN, it masked the gorgeous grain of the natural Cherry Wood!
This would have been fine on the ESW11LTD’s more bland wood, but Audio Technica didn’t lacquer that one. The only portable they lacquered with Urushi is the ESW10JPN and they screwed it up royally.
Of course, that is entirely subjective and despite them masking the immensely gorgeous natural grain of the Black Cherry Wood used in the 10JPN, the Urushi solid color lacquer they used is still damned beautiful…just not as beautiful as it could have been with a lighter Urushi color to make the grain below pop.
People who abuse Art
Do you realize what the previous owner must have done to these headphones to build up enough damage to penetrate months of Urushi lacquer and down to the base coat? My God…they must have been subjected to prolonged grinding against something sharp.
What puzzles me and why I bring this up as an annoyance at all is that the headphone’s cable, frame, interiors, and headband are all in 99% great shape, almost like new if not for the noticeable lines in the leather from normal usage, and light usage at that.
After the first few coats of Urushi on the right cup, I decided to start work on the left side. I’d previously not rubbed any wood polish on that side as of yet and after the first application…the most terrifying thing imaginable happened…the lettering and logos flaked right off within moments of gently buffering the wood with the same polish and cloth I used on the right side.
Damage
So…basically what happened here is that the right cup sustained 0% damage to the lettering, but was scuffed around the lettering to an extreme degree. The left side sustained 95% damage to the Urushi lacquer and was down to a single layer, also scuffed up terribly.
Beyond that, the letters popped right off the Urushi base coat. So, what the hell happened here? Did this person set the headphones on their desk and tap pencils or keys on it daily for years or let their cat claw it daily, but hardly touch anything else on the headphones?
Every part except the cups appears in fantastic shape, so this is a mystery I’ll never solve and one that will eat at me for years to come. The previous owner doesn’t want to talk to me now after I blasted him for lying to me about their condition.
Anyway, it is fine…that odd sound is just my sanity leaving the room each time I think about it. My theory on what happened here is that the previous owner set up these headphones on a stand with the left side facing a window with the sun often, if not daily that shined harshly onto it.
Sunlight
I found out later that Urushi cannot be left in direct sunlight for long periods, which actually can bake it like a yummy and toxic pot pie.
This person likely lived in a hot place with a harsh sun shining through the window and onto only the left cup for years, effectively baking the Urushi a little every day, which then resulted in only the left side ending a near total loss of Lacquering and the lettering being extremely fragile.
I’d noticed that the Urushi of the left cup was almost totally down to the very first layer and required just one pass with 0000-steel wool to fully expose the bare wood and stain below.
The right cup took hours to strip in the same manner and down to the same level, as it had almost no loss of layers and was only scuffed up and pot marked with small holes…almost as if something small like a needle poked it a few dozen times in random places and pierced a few layers of the Urushi.
Other Factors
Speaking to other Urushi artisans in Japan over the course of the last few months of this project have all said the same thing when I asked them about why this could happen, so I guess it is a known thing with this art form. I recorded a video of the first clear Urushi base coat onto the right cup and uploaded it to YouTube.
In the video, you can see the left side letters still intact, but you can also see briefly that the letters appear RAISED off the lacquer finish, prominent and more eye-catching than the right side. The reason is that Audio Technica stamps the logo and text after the Urushi process.
The damage done slowly over time dwindled the lacquer down on the left cup, effectively liquefying and losing layers as time went on…but the letters and the lacquer directly under them remained gently raised like text on a bubble.
It became immensely fragile and wiped right off with the first attempt to dab some polish on a cloth and move it around gently over the cups. Christ Almighty, this is why the Audio Gods never gave me superpowers…or else I’d teleport to the original owner and drop-kick him for this.
Lighter Color
After the lettering of the left cup flaked off, I was forced to undo weeks of Urushi and polishing of the right cup to match the now much lighter color of the left side. It was a blessing in disguise, as the second go of it all resulted in a more beautiful-looking wooden cup.
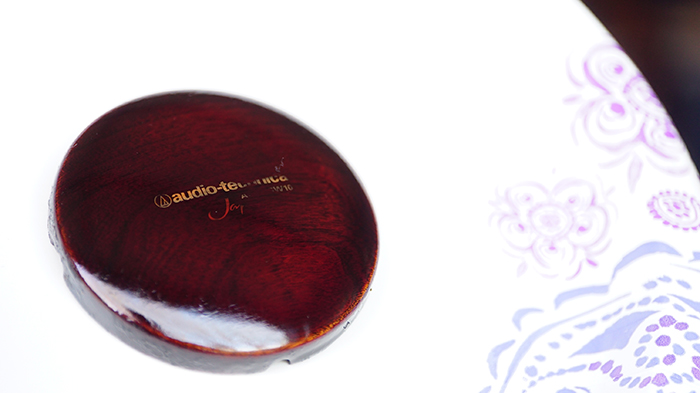
The stock version was quite dark and matte, textureless, and moderately reflective. After re-sanding down the right cup to match the left side and applying weeks’ worth of Urushi, the final product looks so much better than it ever did before.
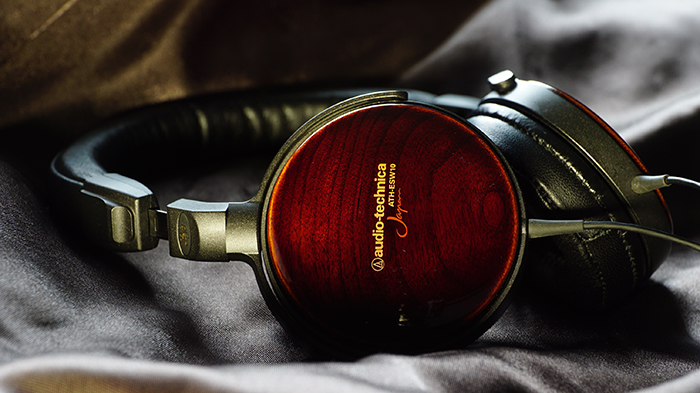
Now a lighter gradation of wood hue, the ESW10JPN was gifted a new makeover and I believe I’ve now the most beautiful and highly polished ESW10JPN on the face of the Earth.
The Journey’s End
At the end of this journey, I’d learned to respect the art involved in Audio Technica Urushi lacquering and ended up with a unique headphone. I took this headphone from a battered state and nursed it back to a healthy state of being. I actually had to learn a centuries-old art form just to get the job done to my liking.
True, it is not 100% mint, as the damage ended up being far worse than anticipated after the removal of the Urushi lacquer that exposed the wooden cup damage. I think I was able to grant new life to the headphone and that means a lot to me. I feel good about the final results, but she will always have her scars.
The entire process from start to finish has taken 3 months in total. Hours of careful sanding and gentle stripping of the original Urushi, multiple attempts to create a dust-free area, and having to re-strip the Urushi after finding a small piece of the brush that cured into the lacquer.
Other particles of “things in the air” were able to land on the surface within seconds of trying to place the wooden cups in a dust-proof container and bad imported brushes from Japan and mislabeled Urushi ended up being a different color than advertised.
This has been a stressful ride, but also one that is worth it to restore something this beautiful.
Click on page 2 below for my sound impressions


