Software
Platform
The DX200 uses a dual boot Android 6.0 ‘Marshmallow’ platform in combination with their Mango OS first rolled out on the DX80 last year. This is underpinned by an 8 core 64BIT ARMv8 processor and 2GB of RAM and a PowerVR Rogue G6110 GPU. It is the first time I have seen Android 6.0 in a DAP out of the box with the majority running Android 5.1 at the time of writing.
Some options are not available such as Google Play service but otherwise, it’s as open as Android can be. If you want to load up apps though it is done by side loading rather than by direct Google Play interaction.
APK Testing
I downloaded a few apks and they installed and ran without any issues. You may have to fiddle with some permissions settings before they run properly since Google normally manages that automatically when using the Play app to download.
Streaming apps such as Spotify and Deezer pose no such loading issues. I can also load and install TIDAL without an issue but TIDAL is not available in our region so I cannot tell you how smooth it streams. Music management apps such as HibyMusic, Onkyo HD also work flawlessly.
Performance Benchmarking
The 2Gb is really a baseline spec for RAM in Android 6.0 so media players and basic app management should flow smoothly enough but I would not go any further into hardcore gaming.
Smartphone Comparison
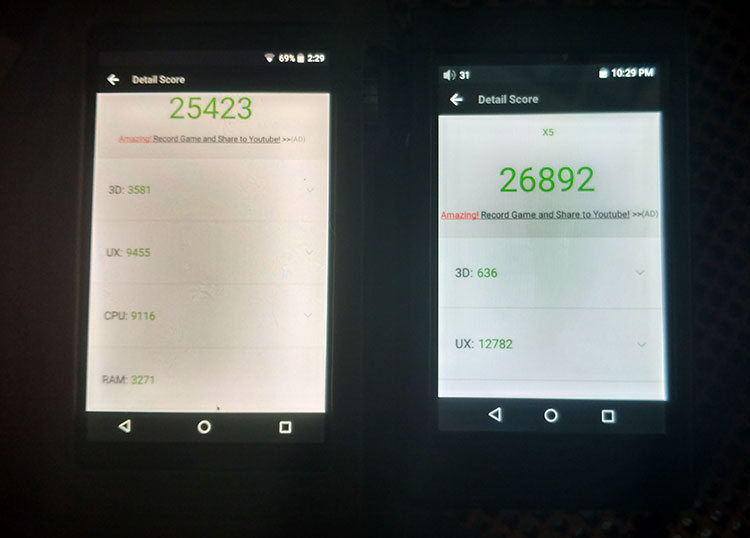
Loading up AnTuTu Benchmarking and using the quad-core ZTE Axon 7 smartphone, also on Android 6.0, as a direct comparison, the DX200 achieved a benchmark of 25423 points compared to the ZTE’s score of 141530.
The dedicated Qualcomm MSM8996 Snapdragon 820 with an Adreno 530 GPU in the ZTE does make a huge difference, so whilst the DX200 might just about scrape by on Angry Birds level it is not yet capable of delivering a smooth graphical CPU intensive performance modern smartphones can deliver.
FiiO X5iii Comparison
Compared to the newest FiiO DAP, the X5iii, the score was quite a mixed bag with the average performance score higher at 26892. 3D scores were much superior with the DX200 at 3581 compared to the rather paltry 636 on the X5iii. However, FiiO’s RK3188 CPU seems to perform slightly better than the DX200 8 core equivalent at 10345 points compared to 9116.
The X5iii also seems that bit snappier in the testing with the UX score significantly higher at 12782 compared to the DX200 at 9455. Note the X5iii is running Lollipop 5.1 and not 6.0 though with only 1GB of memory.
Those looking for an all-purpose device should really look for a tablet or a smartphone. However, for the latest up to date streaming apps such as TIDAL and Spotify, the DX200 is very capable though I do wonder if Android 5.1 rather than 6.0 would have been the ideal platform for the DX200 to get the snappiest response.
Mango App/OS
If you want the DX200 to operate purely as a DAP you can dual boot out of Android and into the iBasso Mango OS. It has a similar look and feels to the Android App, perhaps some minor cosmetic tweaks and more system choices in the Advanced section, as well as how the library lists look but otherwise the general swipe left and right UI operates in the same manner.
Media Management
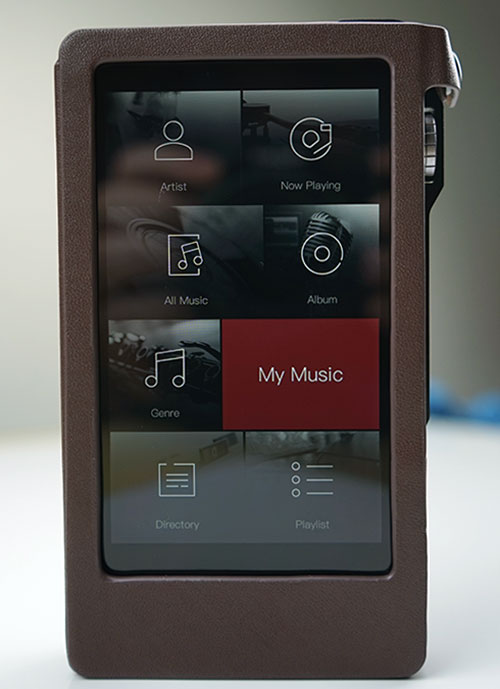
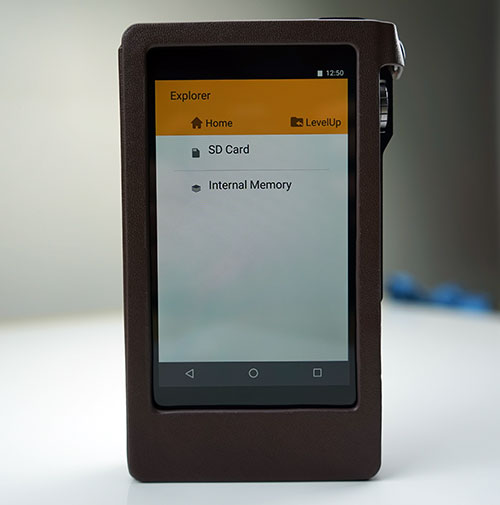
The Mango OS/App is divided into 4 “screens” that operate from a left to right using swipe gestures. The far left if the media management screen where you can access all your music via playlists, album, genre, artist and song category as well as browse the folder structure on the internal and external memory via the directory option.
Proper Organization
I am absolutely delighted that iBasso has continued to use a proper drill down via the genre category and not use a flat song list like so many other stock apps on other DAPs. If you select Genre you see it organized under each label by artist, album and then the song. This is how it should be.
Cover Flow
Another little tweak that I quite like is the ability to flick between album list and album cover for browsing purposes. It is not quite on the level of Apple’s old cover flow concept but it has some nice pop and if your tags are up to date with cover art it is generally quite easy to scroll through.
Media Scanning
Accessible through the advanced setting, the media database builder is quite fast and about 90% accurate. I had some issues with tags in one album and of course, DFF files do not have any tags so they will show up as “Null” in some cases. Others had a few quirks that oddly enough didn’t happen in the Android app and vice versa with one album being all over the place in the Android app but 100% accurate in Mango Os.
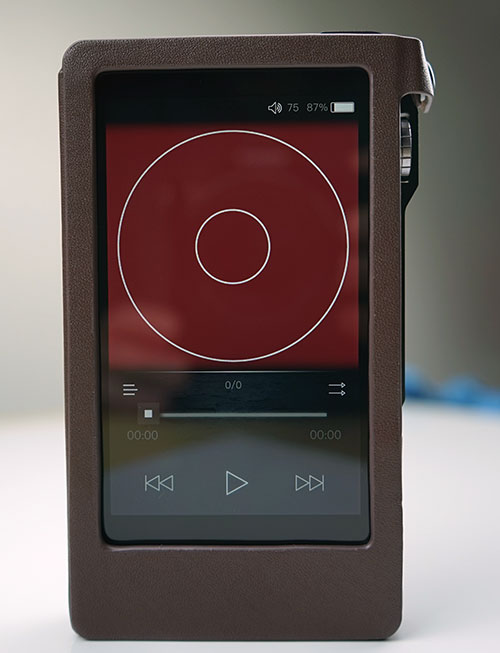
Playback
The second screen is the playback screen and within this page, there is a small sub-menu that pops up when you touch the album art area. This sub-menu has three options: add to playlist, music info of the file played and a delete file option.
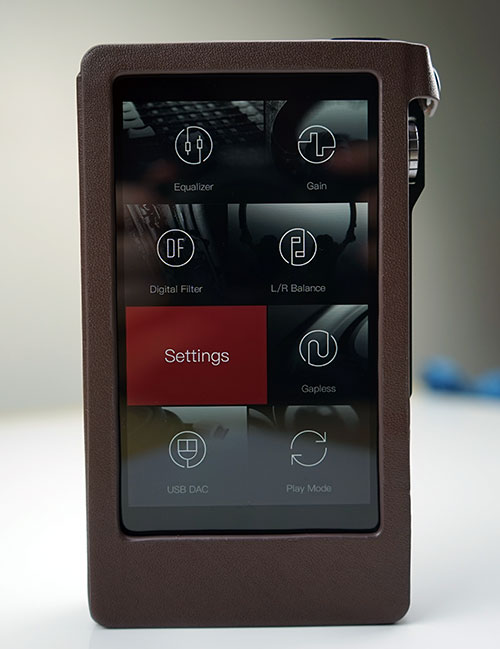
Music Settings
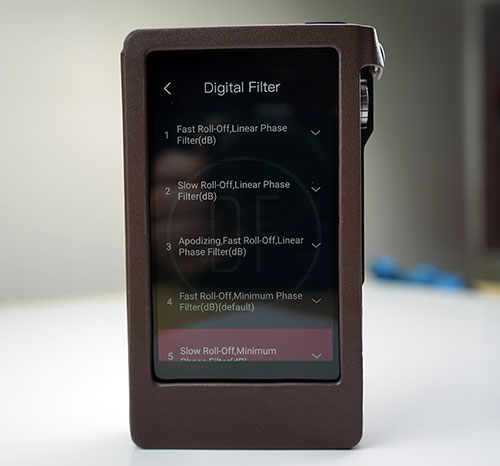
The third screen contains your music settings and includes options such as a 10 band equalizer with 5 presets, gain control, digital filters, channel balance, gapless playback, play-mode and switching to USB DAC.
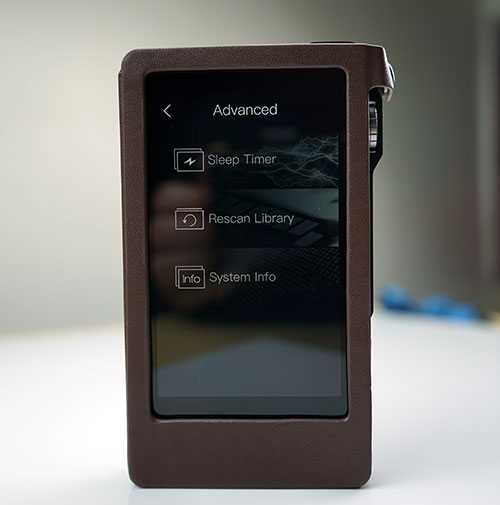
Advanced Settings
The final screen, called advanced settings is a bit slimmer in the Android app since you can control most everything else via Android’s own settings. Here you can access a small amount of system info, build your media library and set a sleep timer.
Boot Times/Lag
Whilst boot time into the Mango OS is significantly faster than booting into Android there is a touch of lag once you are in the native OS in terms of swiping and menu executions. It is more noticeable than the Android app equivalent which is snappier, especially when moving left and right between the 4 UI screens.
Settings
Mango
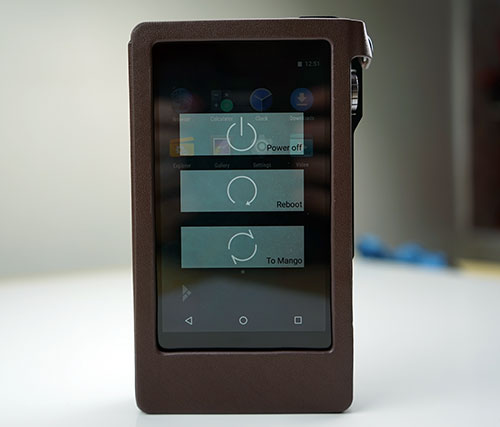
There are two different types of settings, Mango OS and Android 6.0 general settings. Within Mango OS settings the options are rather limited but do include basic options to change the language, control screen brightness, power saving tweaks, library scanning, some short snippets of system info and a factory reset should need one. You can also reboot back into Android from the advanced settings screen in Mango OS.
Android
Settings within the open Android platform should be familiar to most Android smartphone users. You have two settings areas in general; within the drop down menu from the top bar and the core system settings accessible through the cogwheel icon in the top right of the drop down bar or the icon on the home screen.
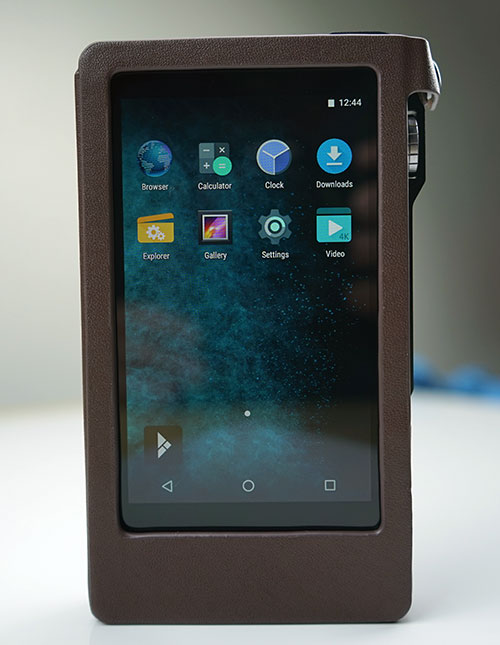
Note, DX200 Android does not have an Android apps drawer, rather it simply loads the app to the home screen and builds them page by page. You can, of course, try to theme an app bar into the DX200 with Nova Launcher or equivalent. FYI, Nova Launcher does work quite nicely.
Drop Down Menu
The drop down menu includes quick access to WiFi, Bluetooth and orientation settings for the screen as well as options for airplane mode (kill all signals) and Cast Screen. Cast screen allows you to transmit the DX200 screen onto a TV or laptop with Cast capability and control the DAP from there.
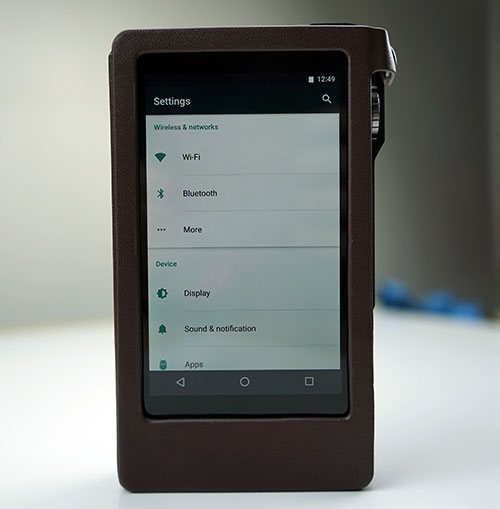
Core Settings
The main setting menu has the more traditional setup functionality including pairing with routers and other BT sources including tethering and VPN options. You can also control your display settings and access some of the audio options that you would also find in the Mango OS such as the digital filters and gain settings (low and high).
Apps Management
Since the DX200 does not have a Google Play service you will find yourself dipping into the apps menu more than normal for side loading apks and their relevant permission settings. Particularly so if you intend to activate any DLNA apps which require permissions to your storage areas. You can also choose to uninstall your apps using this option.
Battery Stats
As with 5.1 the Battery info option is excellent and shows in detail your usage pattern, time and percentage battery power left as well as which functions are consuming the most power. I tend to find myself dipping into this page quite a lot during the review to better understand where the power is draining and usually it is WiFi as the top offender.
Security & Upgrading
The final two sections including personal and system settings are more geared to device security and account control as well as upgrading the DX200 firmware. The personal settings menu will be more relevant to those who begin loading their Google Accounts, email, and Facebook and nearly everyone will be upgrading the firmware which can be done manually or through OTA. Personally, I have found the manual download and upgrade service to be faster than the OTA which frequently times out on me.
OTG
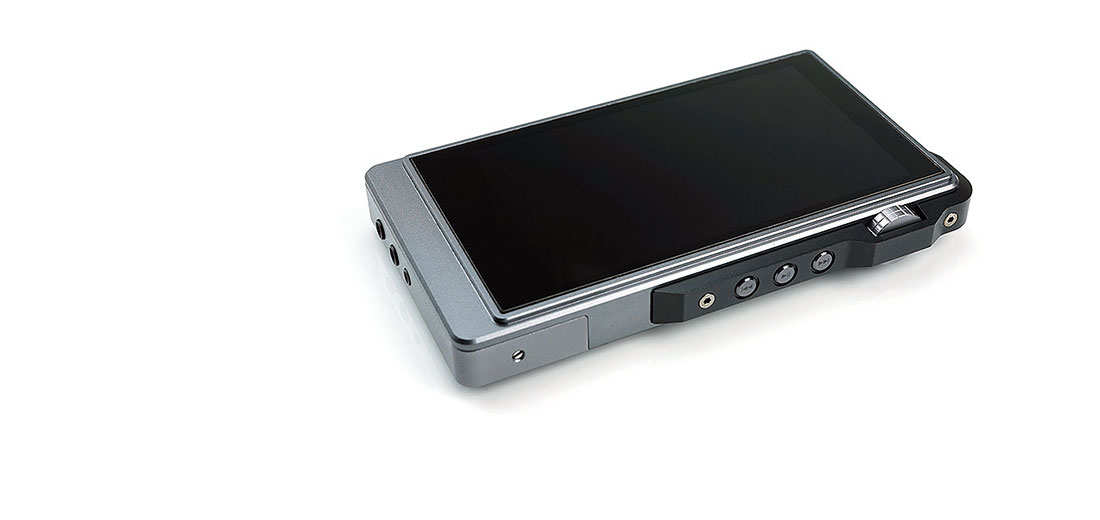
The DX200 uses a USB-C port so those of you using OTG micro USB cables will have to use a small converter dongle but the real estate of these are no more than 1cm in additional length and won’t cost you more than a buck or two.
Options
Once connected it works much as you would expect and the options you can use on the DX200 for connectivity via OTG are excellent from wireless mouse operation, to flash drive mounting and of course digital audio. At one point I had the DX200 mounted on a rack with a BT earphone (EVO X) paired and navigating the Mango app using a wireless mouse connected via an OTG dongle. Felt pretty much like any well-built smartphone in that sense.
Flash Drive
With a flash drive, Android will automatically prompt you on how to use the additional memory either as portable or additional internal storage. I would select portable storage as internal prompts a reformat and make the flash mount unusable with other devices. You can add up to an additional 2TB in memory via OTG.
Scanning
Once completed you can access the additional drive via the directory option in Mango which will display the OTG category at the bottom of the screen. From there you can select your media to playback as you would any other file on the internal or microSD card. Mango will also automatically scan and add any music files from the OTG mounted drive into the DX200 library via meta tagging.
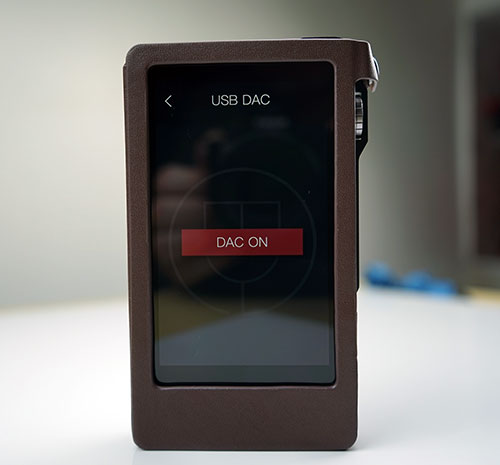
USB-DAC
The DX200 can operate in USB-DAC mode with a PC or MAC though you will need drivers for the PC version. It is not yet clarified if the DX200 will work with the Windows 10 Creators Edition which has native USB 2 audio support so fingers crossed it will work when it is released.
How To Access
You can access the USB-DAC within Mango OS Settings menu (screen 3) and from there it should go automatically into the DAC mode screen once connected to your PC/MAC. In software such as Foobar, you select the relevant output driver and you should be good to go. You can fine tune volume control either on the rotary dial on the DX200 or via whatever software player you are using or both.
No Lag
Once setup you can either output directly to your headphone or IEM of choice or further stream the signal via SPDIF or the fixed analog line out to another amp using the DX200 as a pure DAC. I am also pleased to say that the USB-DAC on the DX200 does not suffer from lag so those watching movies will not suffer lip sync issues unless there is a problem with the movie encoding itself.
Click on page 3 for Sound Impressions & Comparisons